280g Reef - A huge sump
Installed on 5/16/2005, this acrylic sump was built be me to take care of the needs of my 280g reef tank. My goal was to install something that would hold all water that drains when the power is off, house a brand new skimmer, have a decent size refugium, space for coral propagation and it had to look good too.
It took me 8 months to finally get around to building it, and that included waiting for the time to install it as well. It took a solid afternoon to pull out the old one, update the plumbing and install the new one and all the related equipment.
60" x 36" x 16" - built to hold up to 150g.
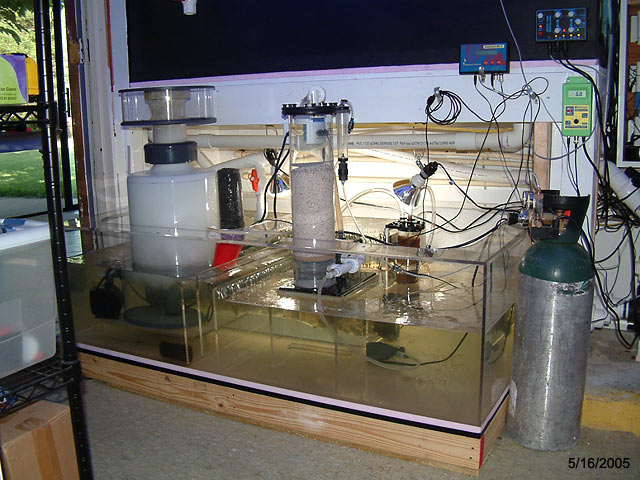
It runs with about 70g in it normally. Flow through the sump is quite peaceful.
It took me a good week to build this sump, using 3/8" acrylic. When asked what something like this would cost, I have to figure it would be around $550 to $600. The acrylic alone cost me about $250. The bubble trap baffles are 2" wide, and work perfectly.
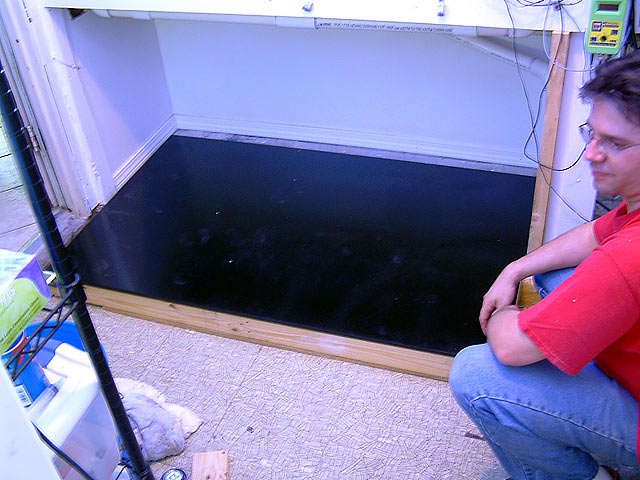
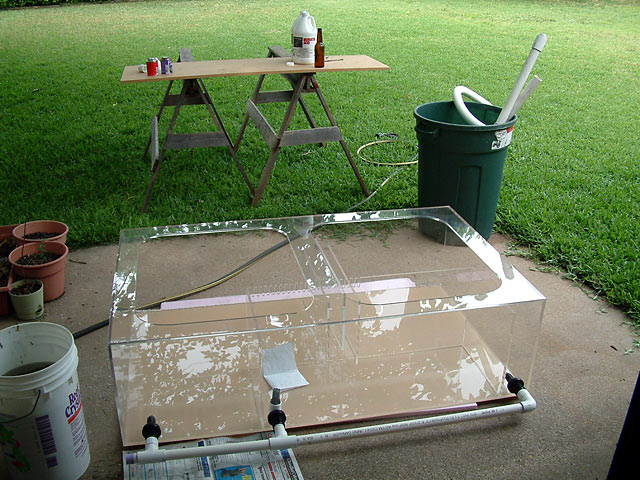
Pre-installation images
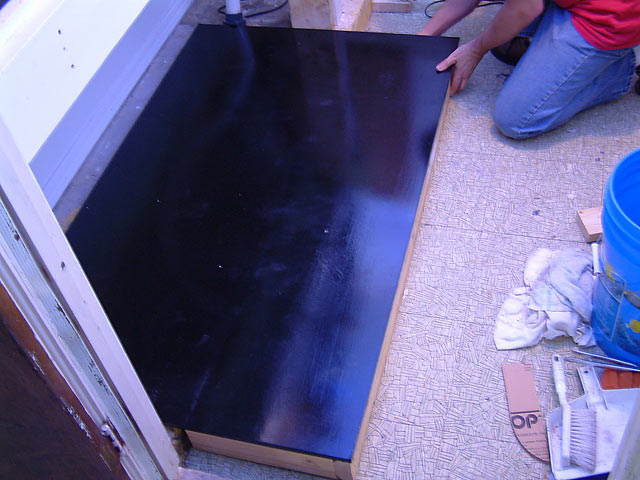
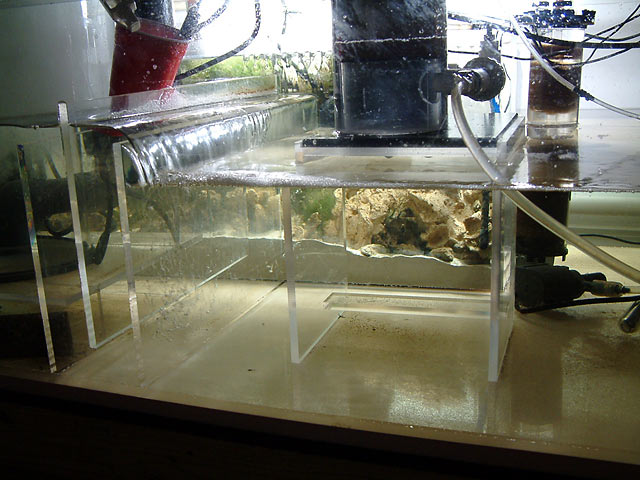
Here is the platform that was installed before the new sump went in. It was treated 3/4" MDF, with a coat of polyurethane on all sides and edges. Once it was leveled well, as the flooring was uneven beneath, a sheet of 3/4" pink rigid foam was placed on top, to absorb any irregularities and provide a perfect surface for the sump to set upon.
I wanted to make water changes easier, so I intentionally designed the sump to drain all compartments via some plumbing in the rear, out of the way. However, I didn't think it out completely, because as I added water to the refugium, I quickly realized that the water level would level out in all sections due to the combined drainline. Pretty dumb move on my part, but not so bad that it can't be resolved.
Here are the three 1" bulkheads, with some plumbing fittings I was about to use.

Each bulkhead has a screen to keep bigger stuff out of the lines, like wandering snails, urchins, peppermint shrimp, or even a lost fish.
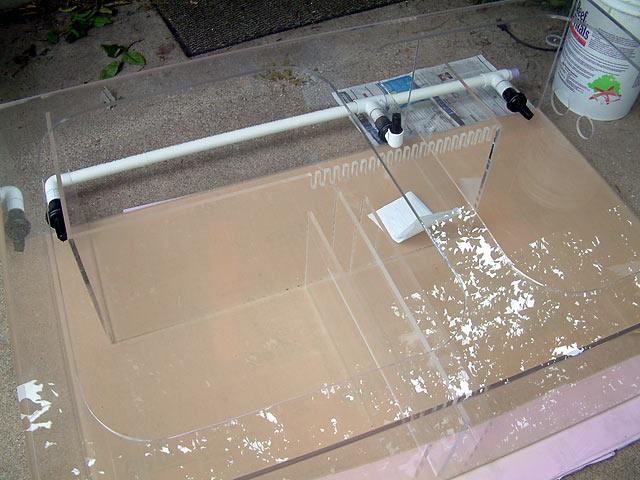
The refugium has an elbow to turn the screen upward, to avoid sucking in any sand during a water change.
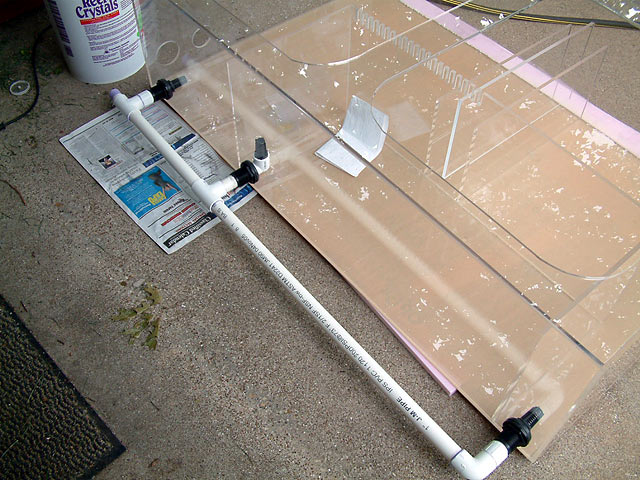
So there it is, ready to install. Again, this was designed incorrectly, and didn't work as planned. Water seeks its own level, making all sections the same height instead of flowing zone to zone via gravity as necessary.
Plumbing
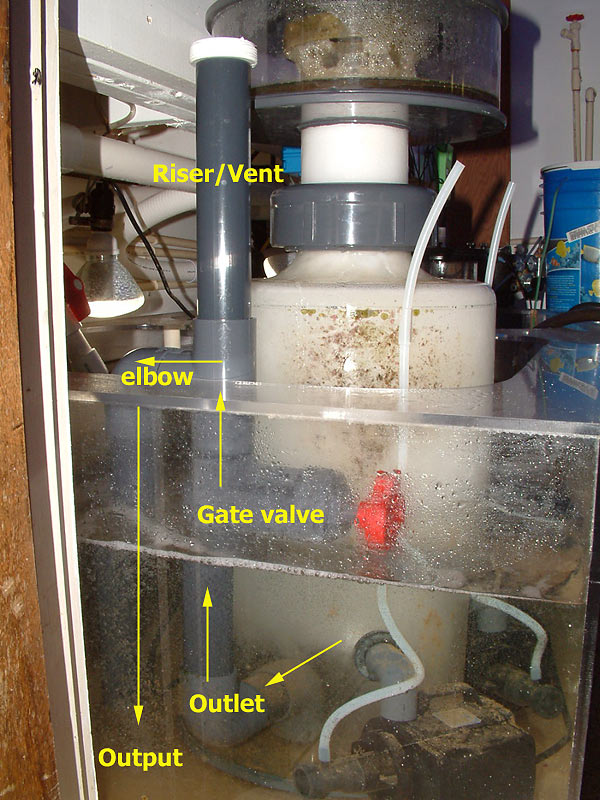
The return plumbing starts at the pump, or return pump. I've used PVC and Spa Flex tubing to create an easy design that maximizes flow. Any extra connections and more friction and reduce flow, but you'll see a few extras since I reused some plumbing. If you are starting from scratch, you can probably skip a few connections to keep things nice and tidy. (Note the text in each image to help identify some of the plumbing parts.)
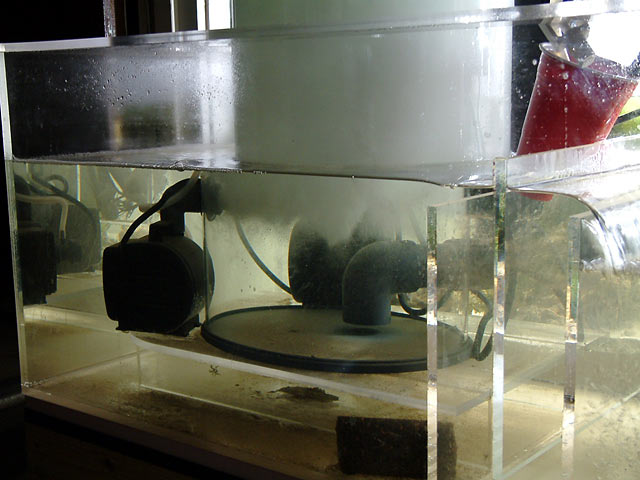
The return pump is a Little Giant Model OPWG-46, and is rated for 3000gph at 0' head. It runs silently, and has been very reliable thus far.

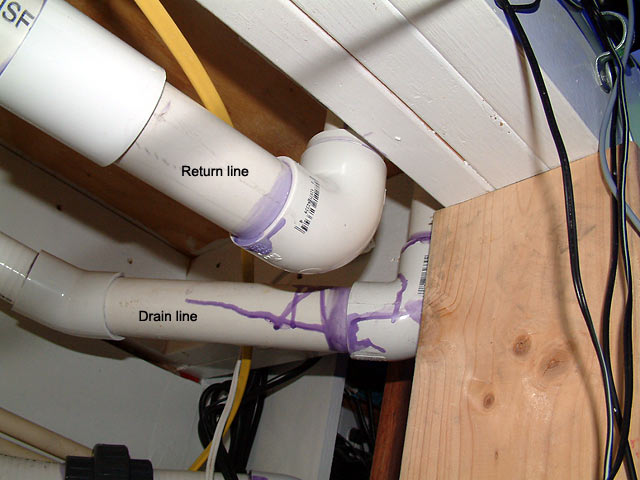
The pump pushes water up through a union, into a ballvalve that can be closed or adjust to throttle back the flow. From there it goes into spa flex tubing. A union allows me to remove this entire section if necessary.
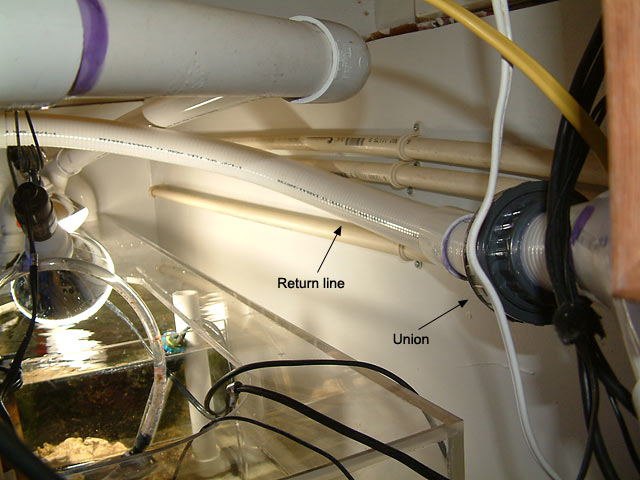
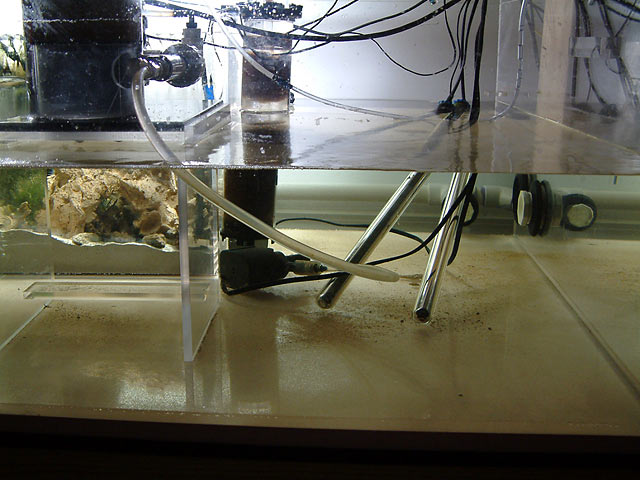
This sweeping curve then leads into a Tee fitting. All plumbing is still 1.5" at this point. You'll also see one of the drainlines in these images, from the right (rear side) of the tank, which flow to the left (far) end of the sump.
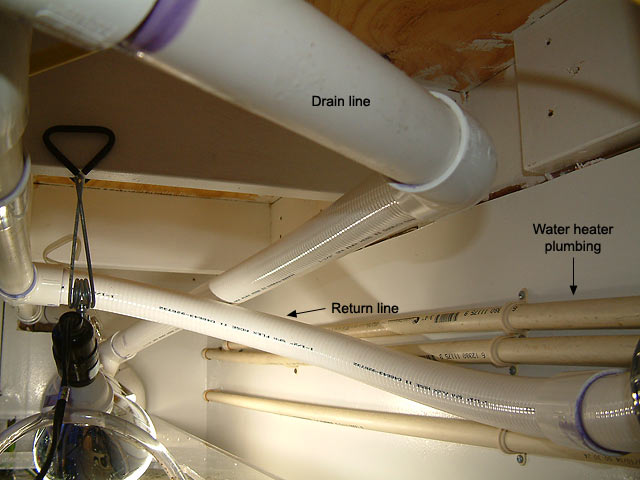
You can barely see the second drainline in the back corner, from the left end of the tank.
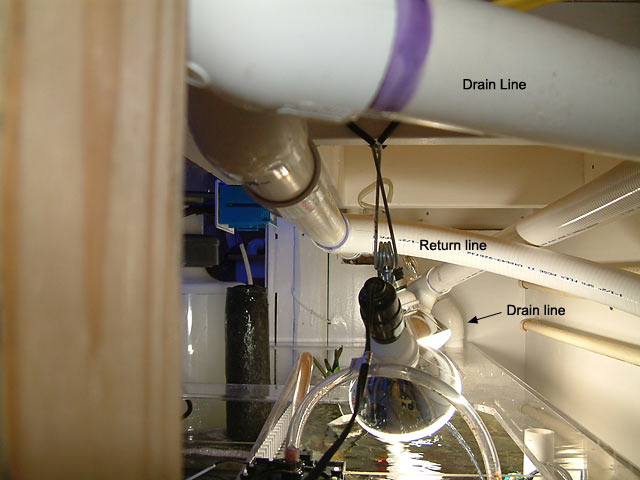
The ballvalve you see allows me to control how much water pours into the refugium from a single drainline. The rest pours into the skimmer section.
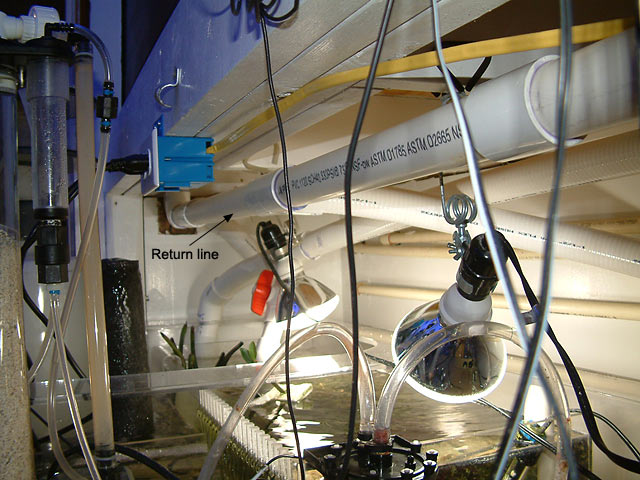
The water is evenly distributed through this 1.5" rigid PVC to both ends of the tank. Here is one end, on the right rear of the tank. Note the elbow pointing up is 1.5".
At this point a bushing is glued inside, then a 1" pipe rises up to the 1" bulkhead.
Best of all, no drips!
Here is a picture of the water entering the left rear corner of the sump, quietly and without creating a billion bubbles.

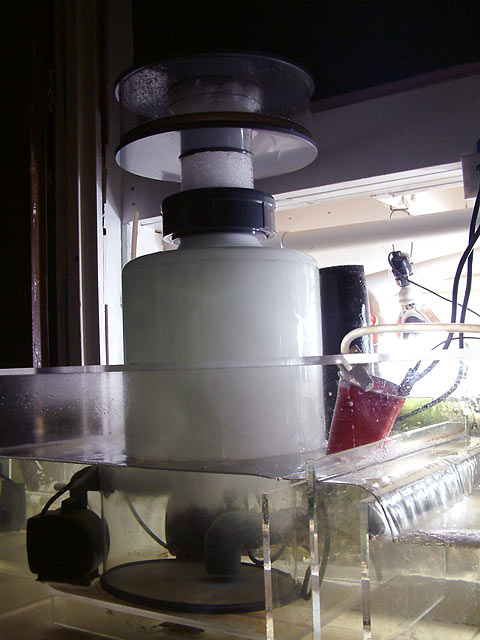
The skimmer
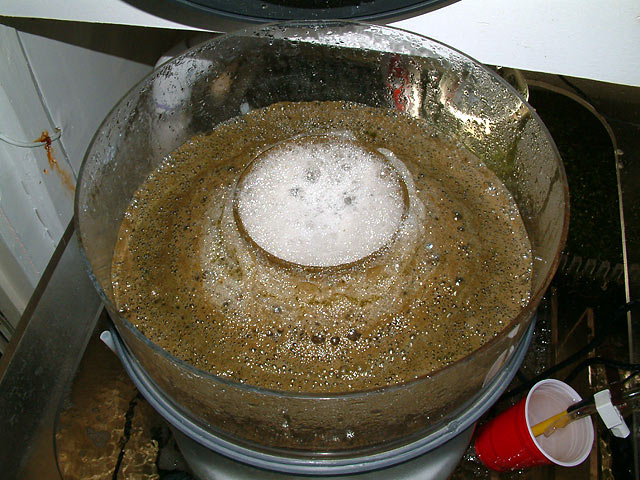
Here are pictures of the new skimmer in action. This is a Euro-Reef 12-2 Protein Skimmer, running with two Sedra 5000 pumps. The skimmer uses a total of 81w of power, and adds no heat to the water.
This is what accumulated after dinner before I shut off the skimmer for an hour. Th cup can hold 1.5 gallons.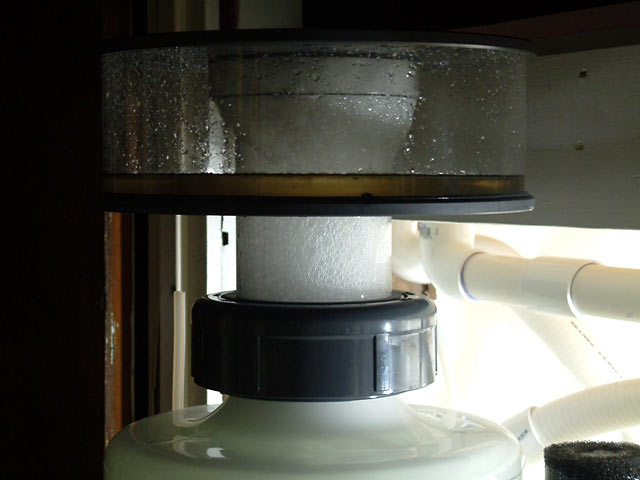
The loudest thing in the sump was the Euro-Reef riser-overflow tube, as the water cascaded out like a babbling brook. Once that was modified, the fish room remains very quiet overall, with the window a/c unit humming in the background. The modification is pictured below, using a $40 kit from Premium Aquatics.
The skimmer pulls out about one gallon of skimmate daily. I clean the cup and neck daily, and this is what it pulls out in 12 hours.
Bubbles? Microbubbles? No way!!!!!
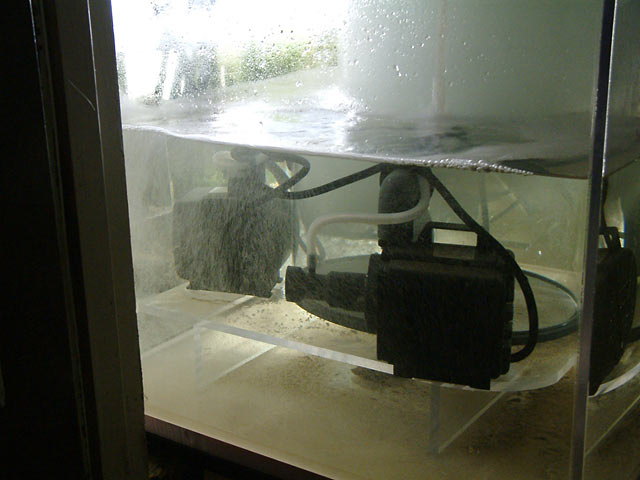
The water drains into a section next to the refugium, and travels into the area where the skimmer sits. Here you can see how many bubbles are moving through the skimmer zone.
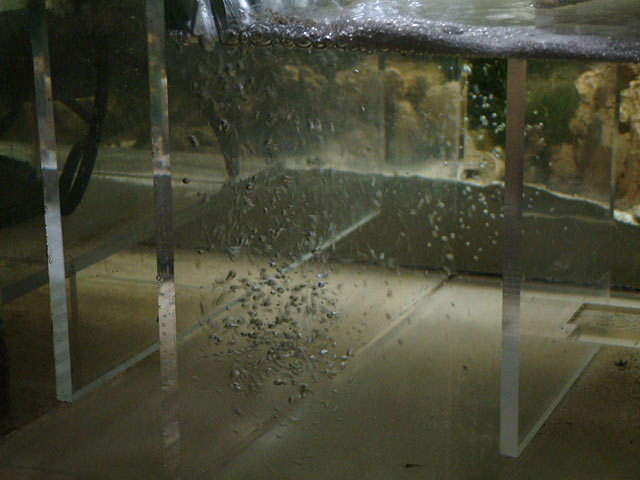
And after the bubble trap, you can see how many bubbles are being created by the water cascading over the final baffle. (The acrylic you see to the right of the bubbles is part of the Calcium Reactor stand, and is not a baffle at all.
One more shot of the section with the Ca reactor stand. I'm not sure what the flow is going through the sump, but I believe this pump can move 3000 gph at 0 head. I'm probably moving 2600 or more GPH now.
And you can see how bubble-free the rest of the return section actually is. Plus, there is plenty of room for frags to grow if I decide to go that route.
Refugium
Below is a picture of the water entering the refugium. I have the 90 degree elbow pointed away from the teeth, so water has to circulate to get back across and exit. The surface ripples gently, and the southdown has remained undisturbed. I almost want more flow in there. It is being lit by a couple of 5100K lightbulbs that are available via mail order. Please refer to this page for details, and be sure to read the January 2005 update at the base of the page.
Often people ask what is a good sized refugium. I tend to recommend 10% of the display tank, but if you have the room for a larger one, by all means go for it. I put in 1" of live sand, some live rock rubble, and macro algae like Cheatomorpha. If you want, add a few mangroves perhaps.
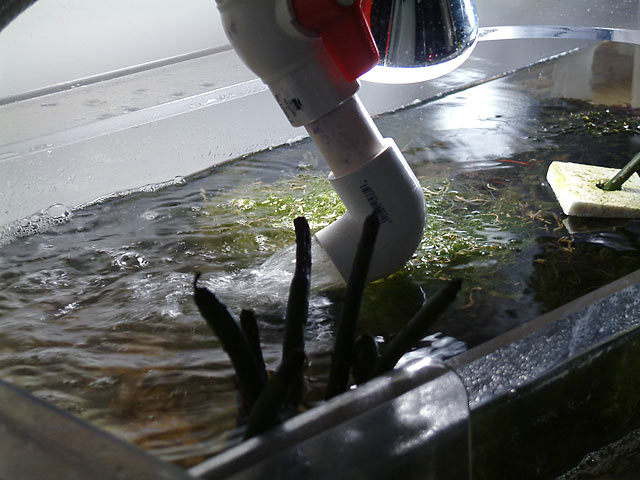
The water is so crystal clear at the other end of the fuge, it is almost invisible.
![]()
I use the Phosban Reactor (pictured below). I've been using two units, as each one is rated for 150g. Here's what one looks like, hanging on the edge of my refugium. Also, please note how the water weeps out of the teeth of the refugium quietly into the return section. That is something many people ask about, because they worry about the water falling and creating microbubbles. It isn't a problem if the flow is within an acceptable range.
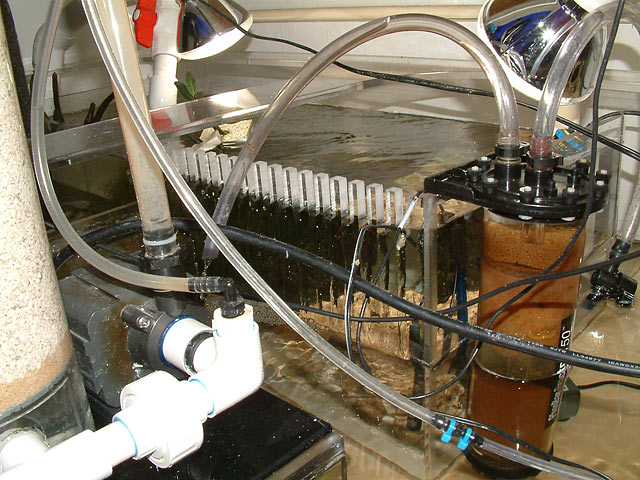
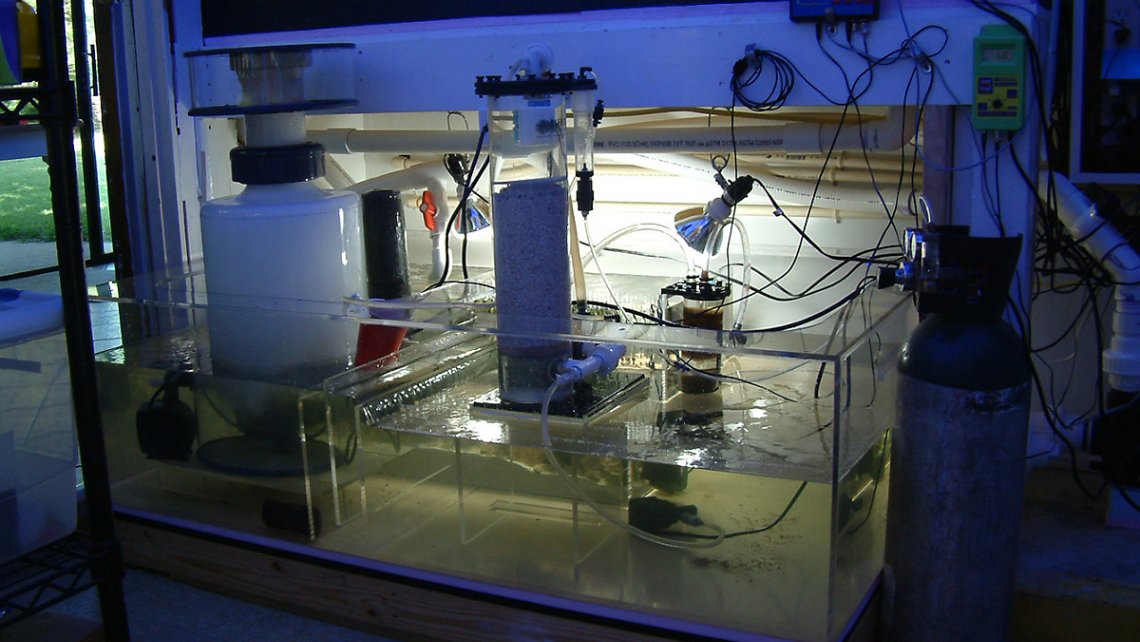
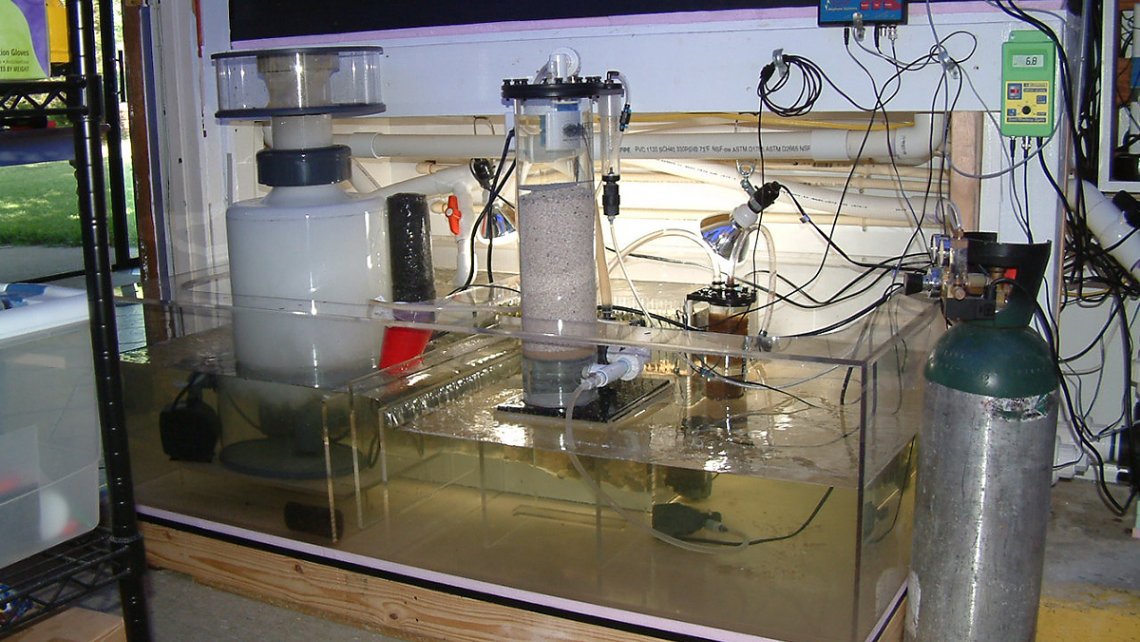
The Calcium Reactor is in the sump. I like this because it clears up some floor space, shortens the tubing going to and from the reactor, and if there is a leak, the water stays in the system and no more water is added via top off.
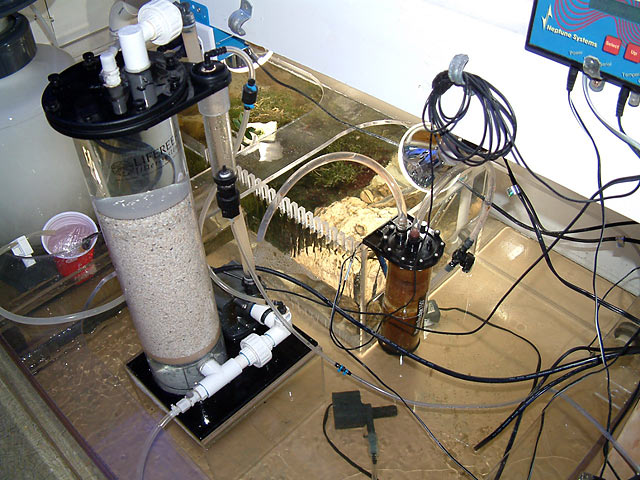
Originally, the entire reactor was on a stand where none of it is in the water. However, I decided later to lower it into the water to help keep the temperature up. It uses a Mag 7, and I mght as well use the "free" heat it generates.
Miscellaneous
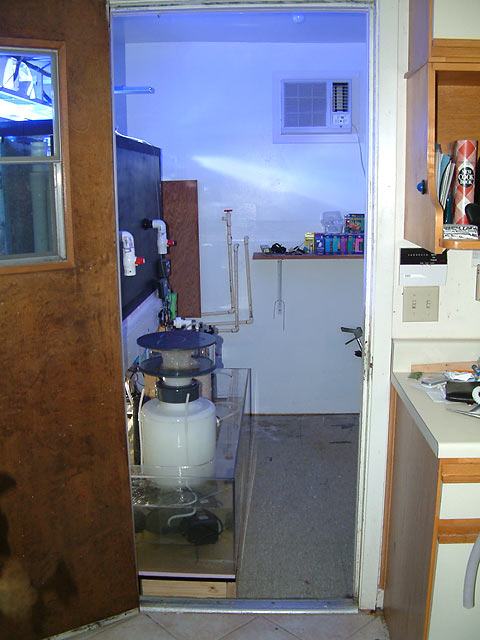
As you can see, the large sump does eat into the doorway somewhat, but I have full access to the skimmer.
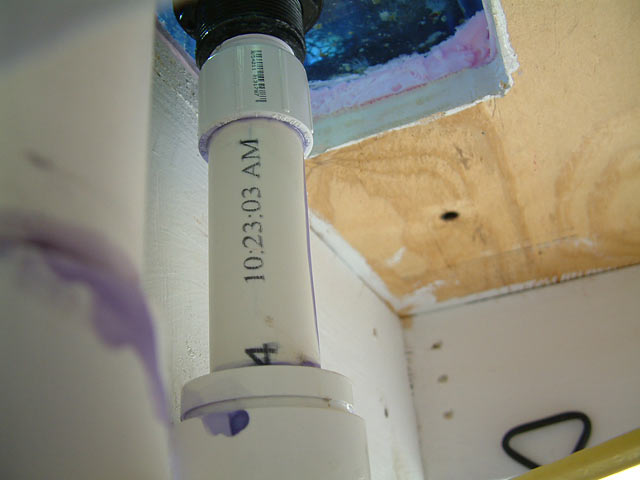
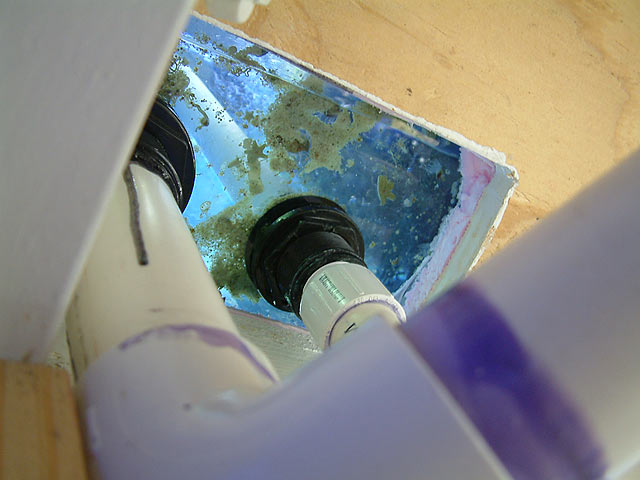
Don't spill purple primer on acrylic. During the connection of the drain line over the sump, I accidentally bumped the item the primer was sitting on (I did think to put something to catch drips), and the can splashed out some primer on the acrylic. It was wiped off within 20 seconds, thanks to Keith, but the acrylic crazed with a bunch of micro cracks in the flange. Disgusted, was I (in a Yoda voice), but oh well. I guess if any fool tries to break in an steal my sump one day, this will be the "identifying scars or birthmarks" the police tend to ask about. The sump isn't discolored by that product, but it definitely can ruin acrylic if given the chance.
Since installing this sump, the new return pump and the new skimmer, the tank runs quite a bit cooler than it did in the past with the Ampmaster 4700. On average, the tank ranges in temperature from 79°F to 80.5°F daily. The window a/c unit is set to 78°F during the summer; the heaters actually kick on at night to keep the tank from cooling too much. All fans have been removed and still the tank doesn't get too hot with the Metal Halide lighting pounding down on the water for 11 hours a day.
The sump has two different return bulkheads: one is 2", the other 1.5". In this way, if I have to switch out pumps one day, I don't have to worry about having the wrong bulkhead size to contend with.
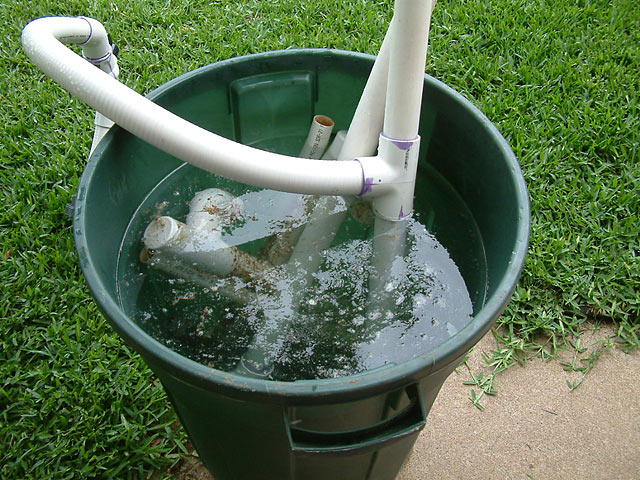
When soaking plumbing parts (below) in muriatic acid, be sure to mix the water and acid well. When I was trying to clean the older part during the transition, I poured one gallon of acid in 25 gallons of water, and it didn't do much to the algae and aiptasia as expected. I poured in a second gallon of acid, and still results were poor. Only later did I realize it had all settled at the base of the trashcan, and stuff like locline were ruined due to the caustic nature of the acid. Mix it well either by stirring or put a pump in the barrel to get the solution mixed up properly.
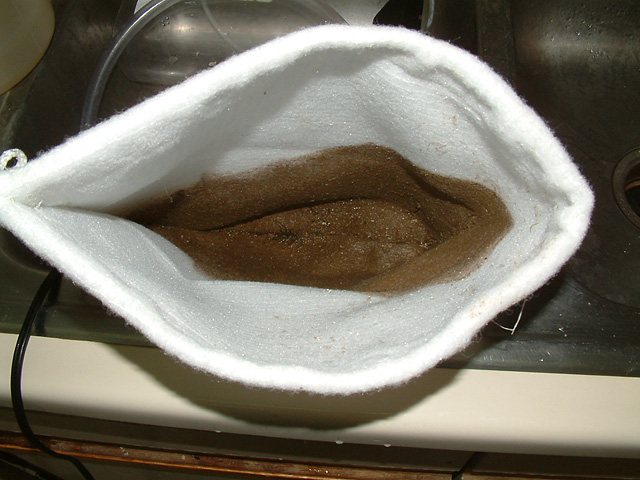
Detritus collects in the sump around the skimmer and especially in the propagation zone. Every three weeks I siphon out all of this, usually using a powerhead or pump to suck it right out of the system. Sometimes I'll do this while doing a water change. Other times I'll put the output from the pump into a filter sock (below) to capture all the detritus while not wasting any of the water.
I change 55g of water once a month, unless the tank dictates the need for more frequent changes. This is necessary if phosphate or nitrate levels increase in the tank. While the return pump is turned off, I'll pump out 55g of water, then replace it with new and restart the return pump. This works great, and the livestock is never out of the water.
For topping off, I use RO/DI water that has been stored in a nearby container. Sometimes I'll add kalkwasser powder and drip it into the sump overnight. I plan to set up a larger resevoir with a float switch and Aqua Lifter to replace all evaporated water as needed. The tank tends to evaporate about 3.5 gallons a day.