Reef Maintenance done, again
This past weekend, I seized (cough - forced myself - cough) the opportunity to do some necessary maintenance. This blog will be a tad lengthy because while it may appear like my reef is run by magic, it's actually the effort I apply that makes it look its best. Let me break it down now.
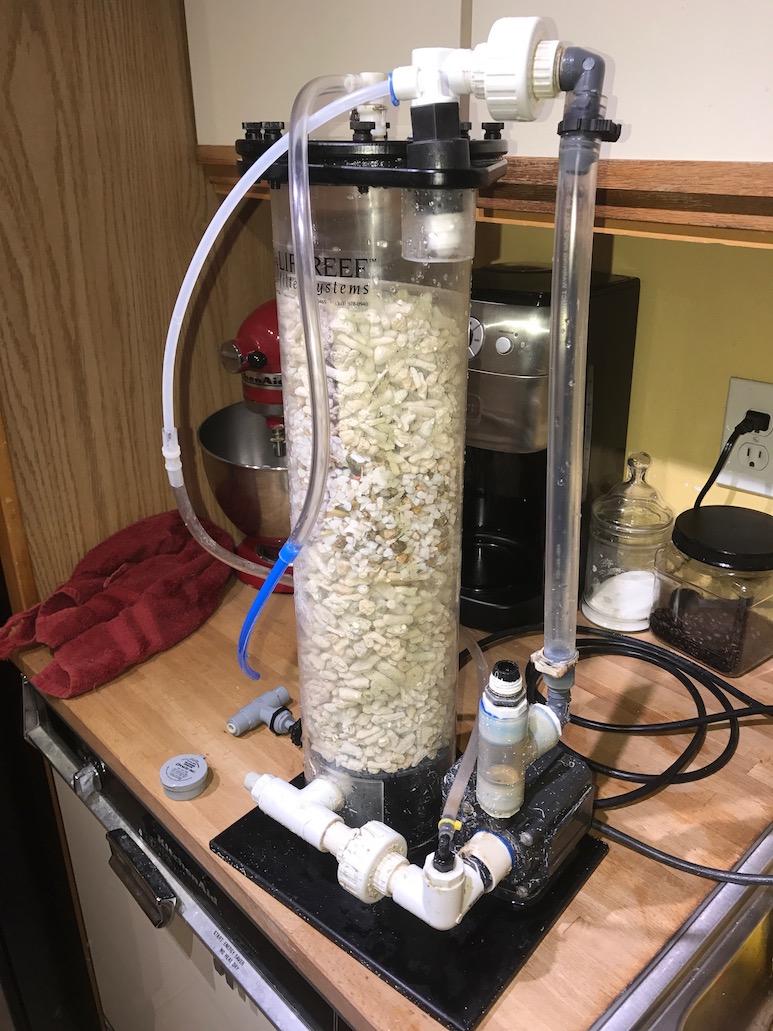
Friday night, 10:00 p.m. and I'm suddenly urged to actually clean out the biopellet reactor. I noticed about 10 days ago that it was devoid of any pellets; it was full of moving water but empty other than some sponges, tube worms, and baby brittle starfish. Every last pellet was gone. That day I tested Nitrate with an Elos test kit and it measured 2ppm. Being the heavy feeder that I am, biopellets are the solution for keeping nitrate down. I opened up a package of Biospheres and poured half the pouch (500ml worth) into a large plastic cup, then filled the cup with RO water so they could soak for 24 hours.
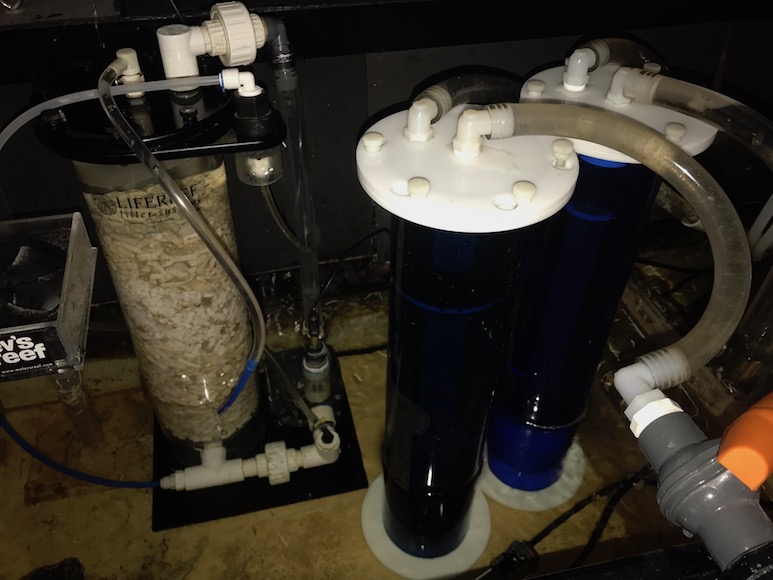
Saturday night around the same time, I disconnected the reactor, poured all the saltwater that was in it back into the sump (no reason to waste the water in an empty reactor that didn't even have detritus in it), and then proceeded to clean it completely in the sink. It takes about 15 minutes to really clean the Nextreef reactors I use, mainly because of their size. Once done, I grabbed the second reactor that has been sitting in the fishroom for the past couple of months and cleaned it out as well. That one is for carbon, which I use occasionally to polish the water. PRO TIP: If you remove a reactor from your system but have no desire to clean it that day, unscrew and remove the lid so it can breathe. This will avoid the contents turning sulfuric. I dumped out the old water, old carbon pellets, and cleaned reactor #2 thoroughly.
Once reassembled, I filled up the clean reactor with the soaked biopellets, and reinstalled it back in the sump's return section. Tubing was reattached and flow was directed into it, enough to tumble the pellets gently and not cause them to float upwards. As I've mentioned previously, I opt to not use the top plastic strainer plate in my reactor since it clogs up too easily in a biopellet environment. The reactor is quite tall, and even if the power goes out, due to the way everything is plumbed, those pellets are not suctioned out into the sump. That's something I heard happened to another hobbyist so double check by testing if your reactor needs that top plate or not.
The second reactor was refilled with about 2.5 cups of GAC (granulated activated carbon), rinsed three times until the water ran clear, and then plumbed into the sump as well. GAC takes the green tinge out of the water, improving water clarity.
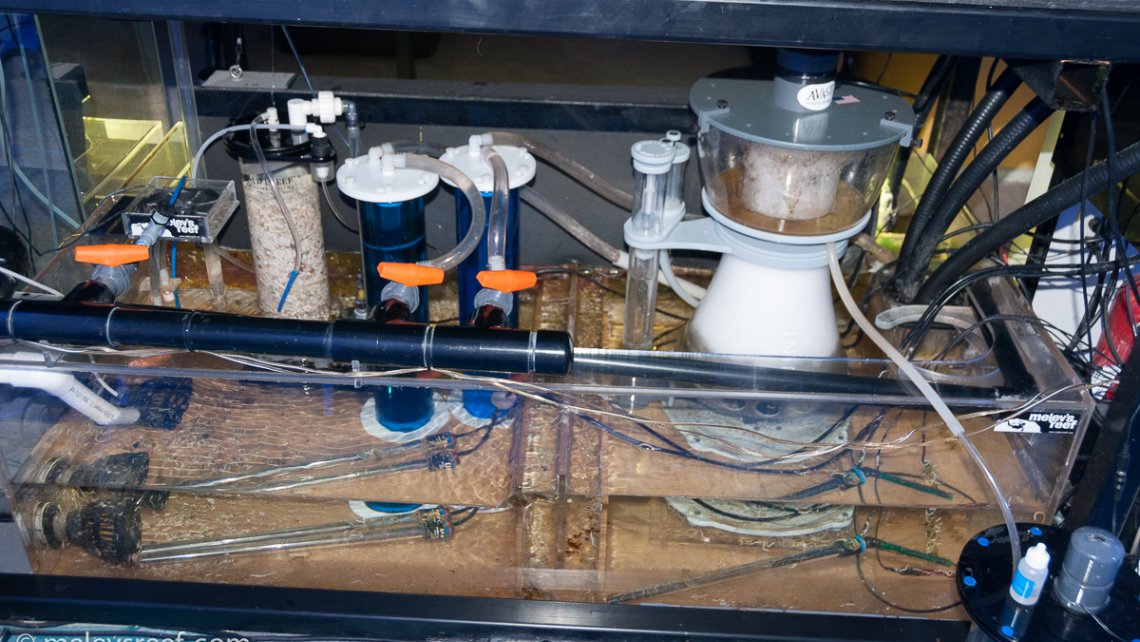
Finally, I tackled the calcium reactor because the reef's alkalinity has dropped low recently (about 7 dKH) and the media was depleted. This reactor has been in my possession since 2004, when I bought the 280g setup used. Once a year I clean out the reactor quite well, refill it with new media, and it takes care of the alkalinity and calcium needs of my reef. My calcium reactor was made by Lifereef, and uses a Mag7 circulation pump. I didn't clean it as much as I could this time, as I didn't feel like doing a vinegar soak. Instead, I scraped away all the calcified filter feeders on the outside of the reactor and pump, cleaned out the main acrylic cylinder, and ran a pipe cleaner brush through the flexible tubing. Also, the remaining media within the reactor wasn't much like previously, and after rinsing it out well I discovered it was actually ReMag, a magnesium additive by Two Little Fishies that hadn't melted away. I filled the clean reactor with about 4.5lbs of ReBorn, the aragonite based media also made by TLF, and then the rinsed out ReMag, then more ReBorn (see image above). Capped it off, reinstalled it in the sump. The needle valve that feeds water to the reactor needed cleaning, so that was taken out, rinsed out well and reconnected with the JG Fittings it uses. Next, I checked the main check valve that the CO2 runs through, verified there's plenty of CO2 gas in the aluminum cylinder, checked that the bubble counter was operating normally, and made sure everything was running correctly once more.
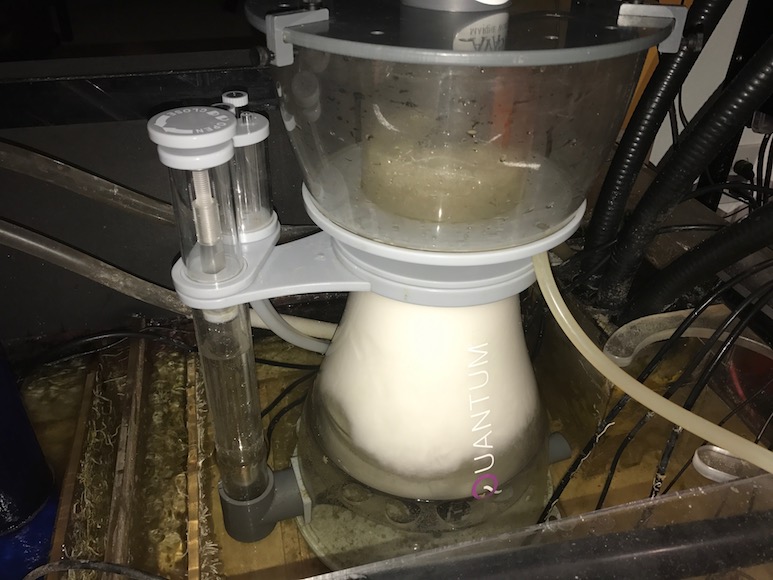
While my hands were wet, I pulled off the Nyos skimmer's big collection cup, cleaned it well and then cleaned off the underside of the lid that the Avast Skimmer Swabbie builds up over time. Once all that was clean, I took a sponge to the body of the skimmer and wiped out both the inside as well as the ouside of the wineglass-shaped walls. The waste collector was also cleaned out. The pH probe was giving me a high reading, so I cleaned off the tip with a gentle swipe of a toothbrush.
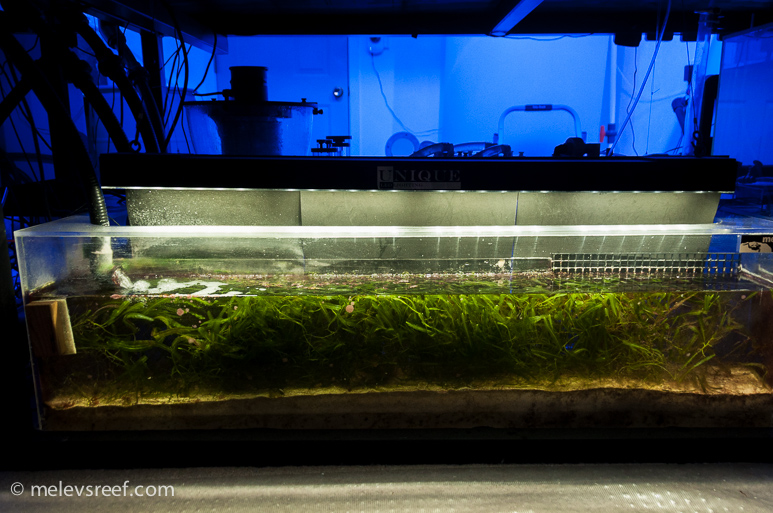
All the walls and rim of the sump were wiped clean so everything is nice and shiny once more. This allows me to spot any issues as well. The refugium area continues to grow some cyano on the surface, which I swipe away with a sponge so light can get down to the macro algae. I think this particular zone needs more flow, and I'll likely change some plumbing in the future to resolve that situation permanently. I also cleaned the front panel to see the caulerpa better.
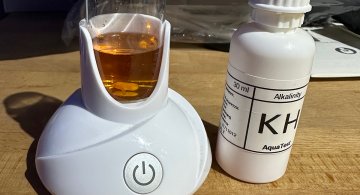
The tank itself needed the glass cleaned, which I did with a cleaning magnet like usual. I checked Alkalinity on Sunday and it measured 8 dKH. Today I checked it again and it measured 9 dKH. I'll check daily for the time being to make sure it just stabilizes and don't rise much higher. While testing today, I also checked phosphate which measured .5ppm so I dropped in 100 drops of Phosphate Rx to bring that number down once more.
A gallon of liquid magnesium supplement (Magnesium Pronto) was mixed up and connected to a dosing pump. I have that one set to dose 90ml per day until the jug is empty.
Overall, doing all these things makes me feel good about my reef. Or lessens my guilt that I didn't do it sooner, mayhaps. ;)
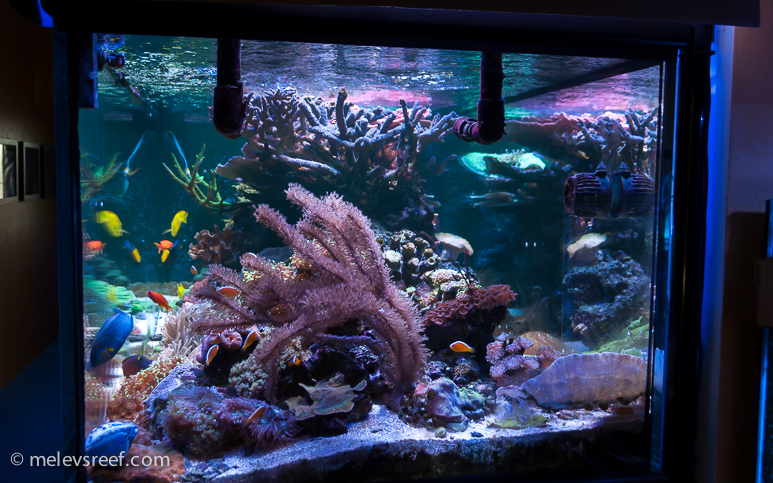
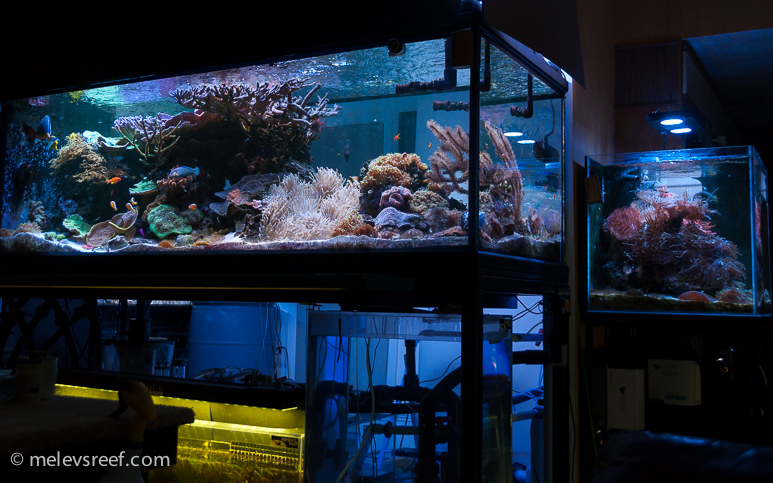
Within 24 hours of running fresh GAC, the look of the reef looks better already. Especially the view from the end of the reef as I look through a total depth of 84" of water.
Two more pictures to wrap this up.
You may be wondering what else is left to do at this point besides sit back and enjoy? Here are some things that still need to be done:
Replace and calibrate probes
Clean all light fixtures
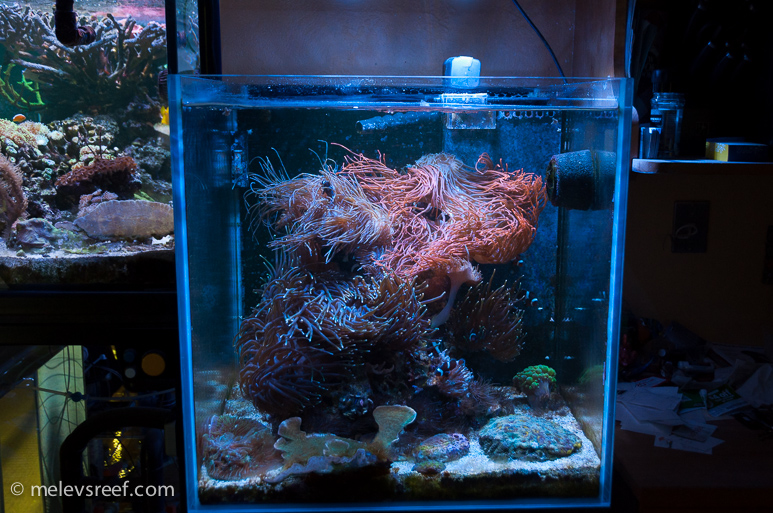
Clean the background of the anemone cube and black wall of the 400g.
Clean all vortech wetsides
Wipe down the top perimeter of the 400g
Do some water changes
Siphon the sandbed in the anemone cube - it's just time to do that
Get the saltwater mixing station replumbed and operational once more
Frag some corals in the big reef, and move them to the frag system
Siphon out waste from the skimmer zone and return zones of the sumps
But that can wait for now, I need a break. And to get some videos posted.