150gpd RODI Installation Instructions
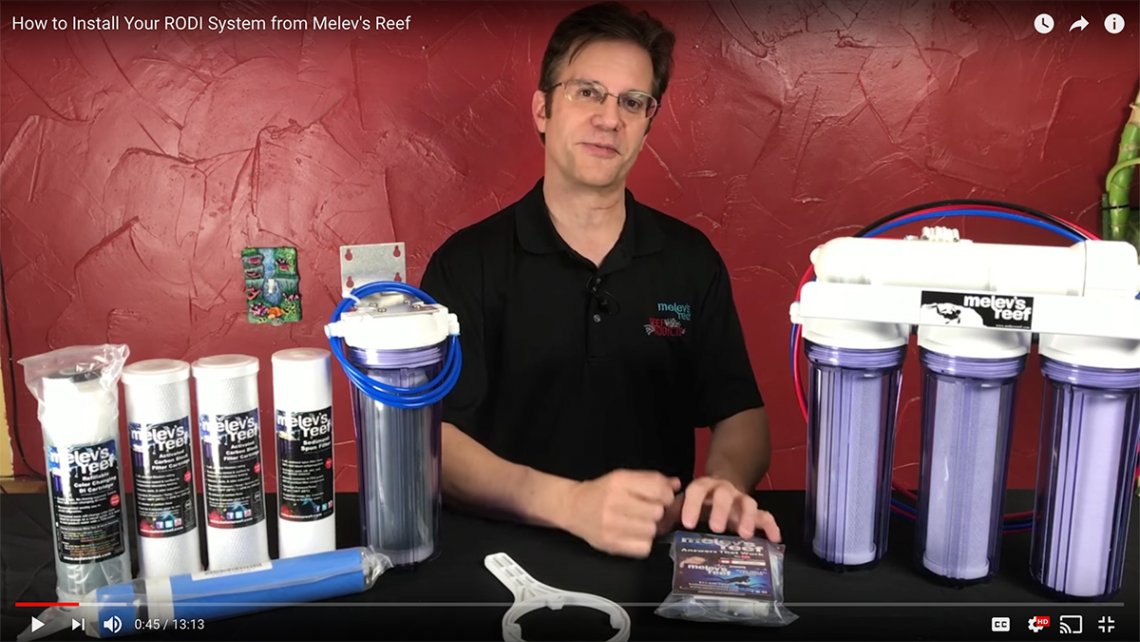
Congratulations! Your reef will thank you for providing excellent water quality from now on. This 100gpd 5-stage RO/DI is very easy to install, but if you have any further questions, you can email me any time. Contact info: Marc Levenson • Ft Worth, Texas • (817) 946-5271 • sales@melevsreef.com
Before you install it, make sure there are no visible signs of damage from shipping. The clear containers (sumps) should be screwed on snugly, and all tubing should be inserted into each fitting. Make sure the tubing is not kinked. With this system's electrical components, it can't be water tested for leaks before shipment. If you encounter a leak from any fitting, it may be necessary to remove and reinsert the tubing in that particular spot. This is not a defect and I'm happy to guide you with additional
help if necessary.
DO NOT USE THE FIRST 5 GALLONS OF WATER THAT THE SYSTEM MAKES. THIS WATER CONTAINS FOOD GRADE PRESERVATIVES THAT MUST BE FLUSHED FROM THE SYSTEM. Do not waste DI resin, run the system for one hour before feeding water through the DI section.
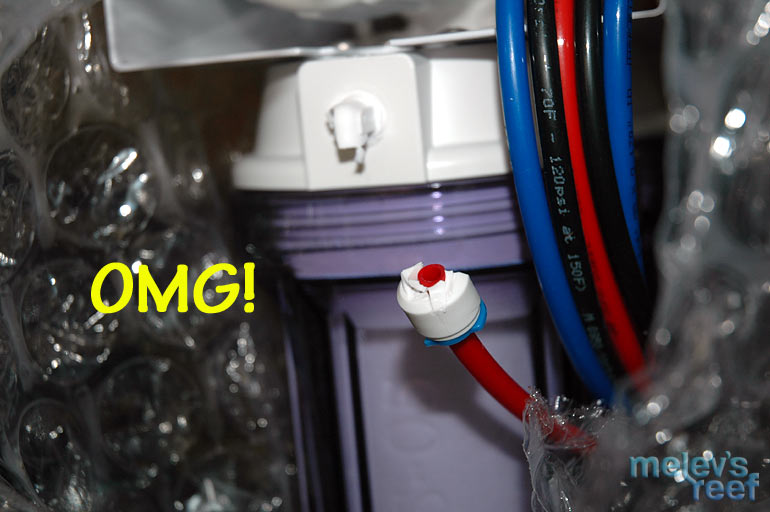
- The red tube is the line that supplies water to the RO unit.
- The black tube is the drain line for waste water. Simply place this tube in a sink or down a drain and allow the water to flow freely.
- The blue tube is your good RO water.
Many households drink RO water, but the RO/DI water is for reef tanks. This is why the color-changing DI cartridge is mounted separately. Mount the main unit where you like with the DI unit to its right, if possible.

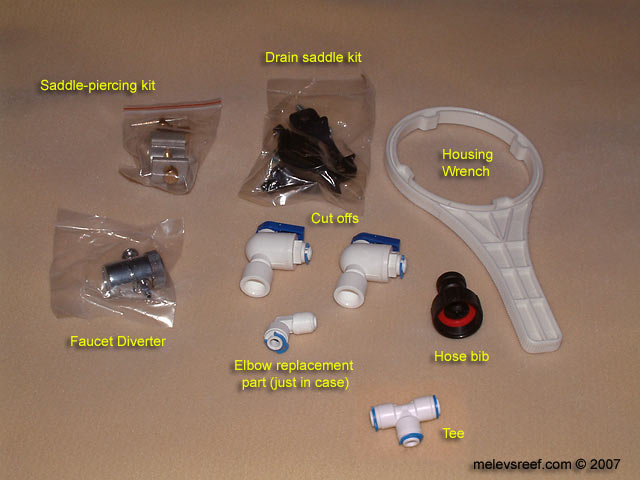
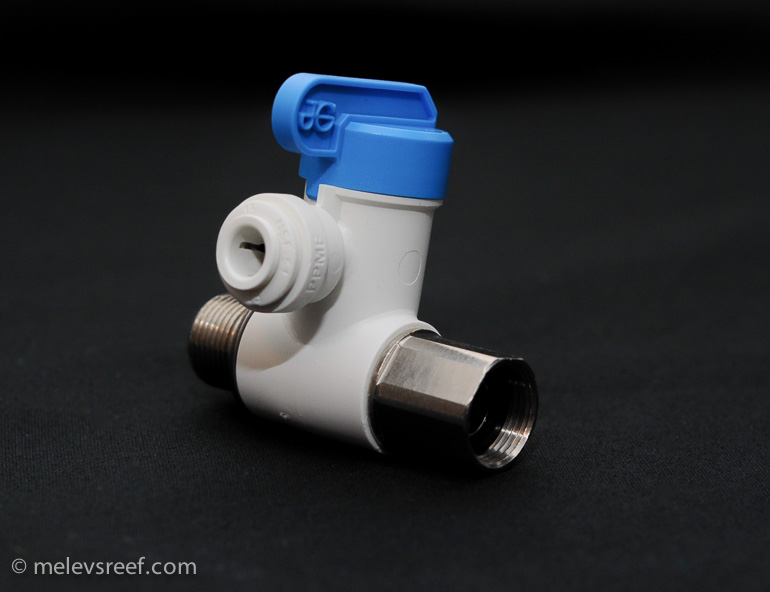
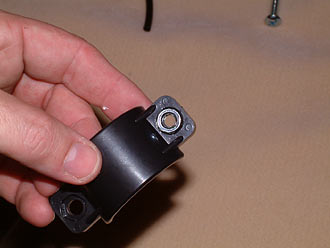
Please note: Saddle Pierce Valve (pictured above) is no longer available as of Sept 2016.
Connecting the unit:
The main system is heavy, and will hang from the wall at an angle if not supported well. Once water is added, it will be even more heavy. I'd suggest making something to wedge behind the housings to help it hang straight, like some type of foam. Make sure the screws you hang it from are strong, screwed into wood as pictured above. After installing the main unit on the wall securely...
There are three different ways to connect the red tubing to your water supply
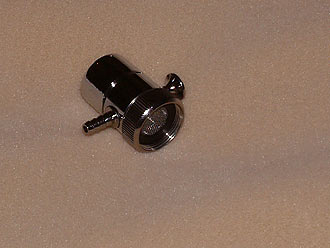
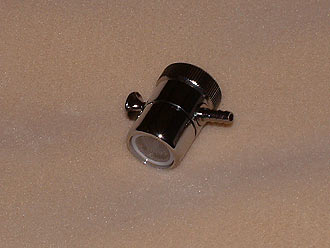
Faucet Diverter
Sink adapter/Faucet Diverter- Remove the current strainer/aerator of your faucet, and screw in the included sink adapter. Press the red tubing over the hose barb fitting, seating it snugly. Turn on the water, and pull out the button to divert water to the RO/DI. Only use COLD WATER.
If the faucet diverter doesn't fit your faucet's threads, this may help:
If the faucet takes a male type aerator (as opposed to the female type aerator found in most kitchen sinks), they will need an adapter for it. I picked it up at home depot for $2. Description on it is:
Standard Male Adapter - 9D
- 15/16" -27 Thread
-Use with 15/16" Female Aerator ID #2B
- Easy to install
It may also necessary to remove the aerating screen before the tee going to the RO system (with the o-ring that is in there; it won't get a bite on the adapter).
Hose bib connection
Water Hose bib adaptor - The same as your washing machine or garden hose uses, a ¾" female threaded connection can be screwed on to the hose bib, and the red tubing inserted into the fitting. Turn on the water supply and your RO/DI will begin to fill up.
To share your washing machine water supply, buy a brass "Y" fitting from your local hardware store to create two connections - one for your washing machine, one for your RO/DI. Only use the COLD WATER connection.
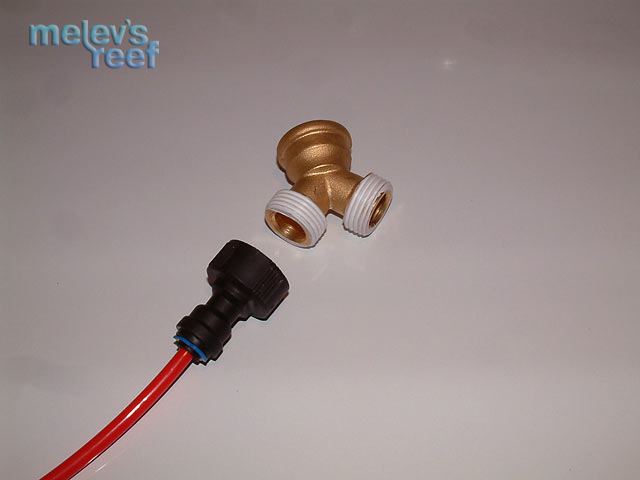
Angled Stop Valve
Option 3) Useful under a bath or kitchen sink, this fitting can be installed on the cold water shut off and the threaded / braided hose is screwed onto the threaded end of the fitting. (fitting appearance may vary). Install this fitting, then press the red tubing into the JG collet fully, then tug slightly to test that it is secure. Open the valve with the blue handle to send water to the RO system.
Permanently install the drain line (If you aren't inserting the black tubing into a nearby drain pipe)
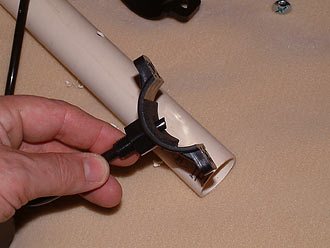
The black drain tubing can be used with the special drain adapter. It is designed to fit around the PVC or metal drainpipe under your sink up to 1.5" in diameter. Drill a 1/4" hole in the side of the pipe, apply the special gasket material to inner surface of the saddle clamp, align the saddle clamp with the fitting directly over the hole, and tighten the screws until snug. Slide the pastic nut over the end of the black tubing and insert 1" (more and the tubing will be an obstruction in your drain) and tighten. Watch for any leaks. (Images and step by step comments below)
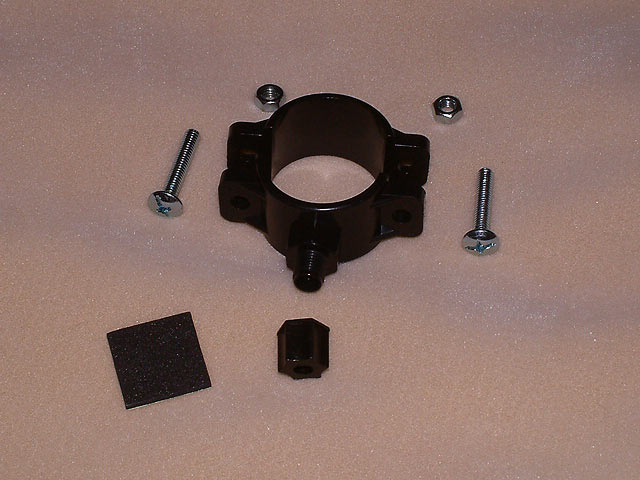
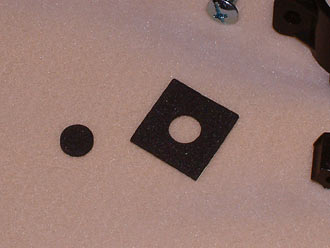
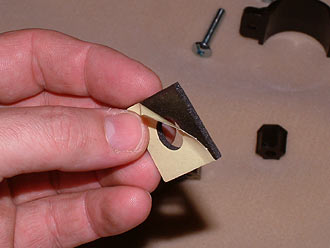
Peel out the center piece of foam, then remove the paper backing.
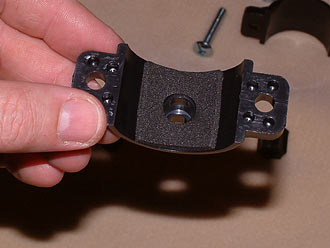
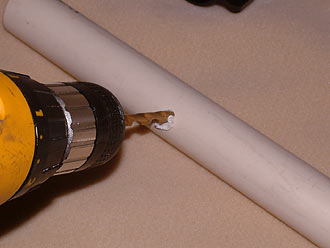
Apply the foam to the inside of the saddle clamp that has the matching hole. Drill a 1/4" hole in the drain pipe.
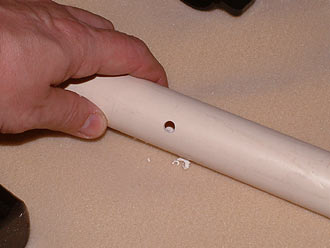
Insert the tubing through the nut and saddle clamp, enough to insert into the hole slightly.
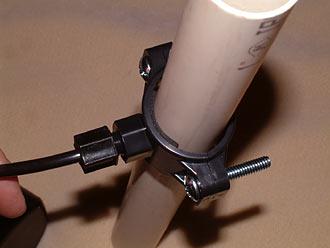
Insert the nuts into the slotted holes, then screw the clamp around the drain pipe.
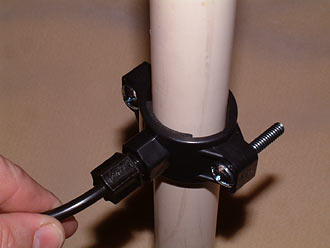

This is what it should look like on your drain. Though hard to see, the 1/4" tubing should barely be inside the pipe so as not to snag anything (hair, etc) going down the sink's drain.
Once the system is plumbed to a cold water source, turn on the source water feed to turn on the RO system. (You can plug in the booster pump now, or wait until later)
The first hour's worth of pure water should not be used, because it contains the food-grade preservative in the membrane. After 5g of RO water have been made and poured down the drain, now you can connect the DI section:
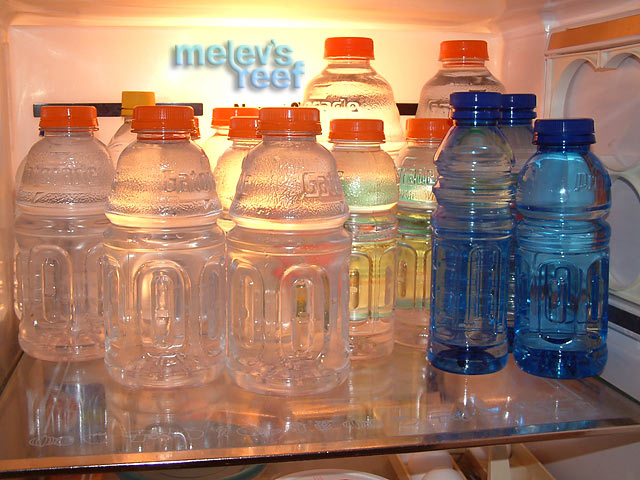
Included in your package is a gray or white "Tee" fitting. Trim the blue tubing coming from the RO unit to the length you need, using a sharp razor blade or knife, trying not to pinch or kink the tubing in the process. Insert this end into the "Tee" fitting. Insert another piece between the Tee and the DI housing (pictured below). The remainder of the blue tubing is now inserted into the base of the "Tee" for drinking water. (We collect RO water in bottles, which are then stored in the refrigerator until desired.)
The DI section will hang on the right of the RO unit. Screw it securely to the wall using four screws. In the future when it is time to loosen the housing to change out the media cartridge, that top section needs to have a strong grip to the wall.

Looking at the picture above, note how the tubing goes into the base of each Tee fitting on the DI section. Water enters on the IN-side on the left, and exits on the OUT-side on the right.
Connect the TDS meter's probes into the top of each Tee fitting on the DI. In this way, it is possible to measure the RO water's TDS as well as the DI's TDS level. I recommend that you install the TDS meter's probes backwards on the DI, installing the OUT probe on the IN side and the IN probe on the OUT side. The reason for this suggestion is that the TDS meter's default view when turned on is the IN probe. Usually the number we want to know is the DI's TDS level, and only check the RO side on occasion. Makes sense, right?
When you press these probes into the John Guest fittings, you will need to press them in forcefully, yet not to the point of doing damage. They need to press in quite a bit; please double check your work. If the hose pops out unexpectantly, flooding the area will occur. Once they are installed correctly, reinstall the tiny blue retaining clips.

Included are two blue-handled ball valves, which are your shut offs. Insert the blue tubing coming from the "Tee" and from the DI unit into each one. You can only use one valve at a time when producing either drinking water or RO/DI water. The ball valves will have a John Guest fitting on one end, and is threaded on the other. Remove the blue clip. Press the tubing into the John Guest fitting firmly, then tug slightly to seat it. Replace the blue retaining clip. Ignore the other side with the internal threads, they don't connect to anything in this application. This is where the water comes out when you make RO or RO/DI water.
Connecting the booster pump
The booster pump has a power cord. This needs to be plugged into a nearby power outlet. A 110v extension cord may be used if the outlet is located out of reach of the pump's cord. Leave it plugged in at all times. The only time the booster pump will turn on is when you make water, and when done and the ball valve(s) are closed, the entire system including the booster pump will become silent within 90 seconds or less.
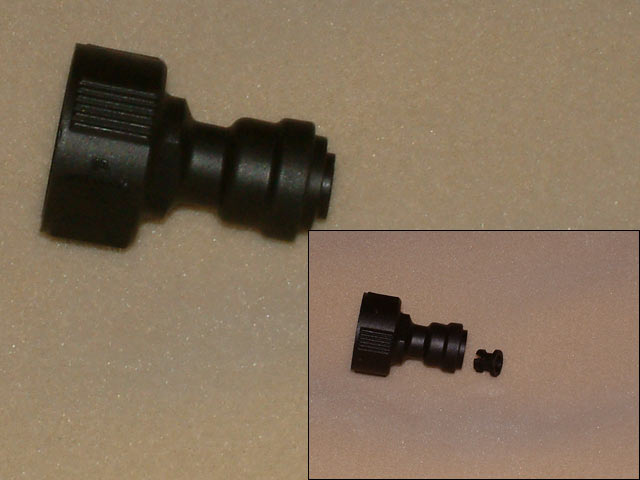
So what is this piece for?
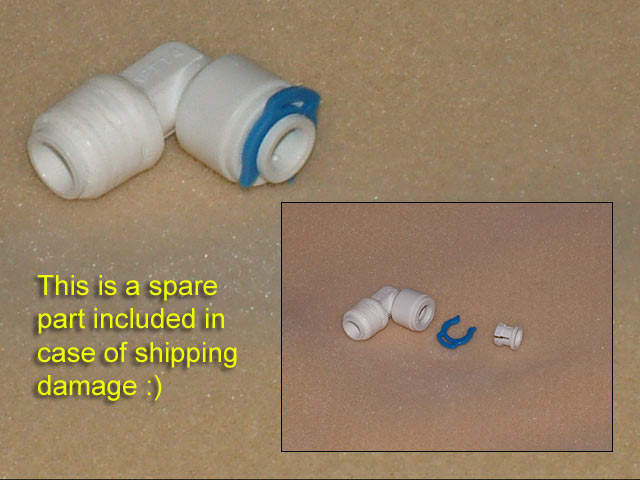
The shipping companies occasionally break a fitting from time to time. I've included an extra elbow in every order so that if you find that your system has been damaged, you can quickly fix the problem. It is already wrapped with teflon tape, as pictured above.
Carefully extract the broken half still in the unit, using either one side of some needle-nose pliers or a small flathead screwdriver. Wedge it in gently, and unscrew it from the system. Screw in the new one by hand.
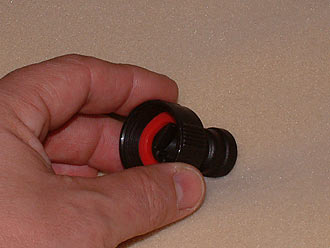
If some tubing is connected to the broken half of the old fitting: Remove the blue clip. Using your fingernail, press the collet against the fitting (what’s left of it) to extract the red tubing. Press the tubing in firmly while holding the collet down against the fitting, and pull the tubing out. This brief video may help.
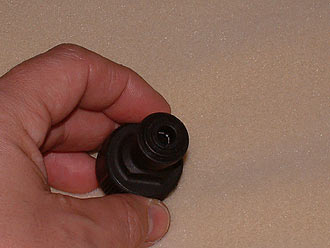
On the new fitting is a small blue clip. Remove the clip, insert the tubing into the collet firmly. Tug slightly to seat it, and replace the blue retaining clip.
If the collet (the small plastic insert) was cracked or broken during shipping, you can use this spare part. The blue retaining clip may come in handy as well.
DO NOT USE THE FIRST 3 TO 5 GALLONS OF WATER THAT THE SYSTEM MAKES. THIS WATER CONTAINS FOOD GRADE PRESERVATIVES THAT ARE BEING FLUSHED FROM THE SYSTEM.
WHENEVER REPLACING FILTERS, ALWAYS FLUSH THE FIRST FEW GALLONS BEFORE USING. OPEN THE RO BALL VALVE (BEFORE THE DI SECTION) TO AVOID WASTING THE DI RESIN.
What happens next? The unit will fill up with water. When you make RO or RO/DI water, for every gallon you make, you’ll waste 3 gallons of water. This 3:1 ratio is normal, assuming you have average TDS, tepid water temperature and good water pressure. The pressure gauge will begin to rise, the booster pump will turn on and the gauge will move to 90-110 PSI.
If the DI chamber doesn’t fill up to the top with water...(Note: A brand new DI cartridge may take as long as 14 days to stay full all the time. This is normal, and is working properly.) This may occur when making vast amounts of water at once, or when the water supply is very cold during the winter months. Once you close the ball valve, the DI unit will fill to the top, and at that point the system will be off (hissing stops).
You can expect to make approximately 6.25 gallons of RO/DI water per hour, when optimum conditions exist. (150 gallons per day, divided by 24 hours). In the colder months where I live, it takes 65 minutes for it to make 5 gallons; in the summer months it takes 40 minutes to make the same amount. (Water quality varies from county to county, and state to state.)
When you close the ball valve, there will be a short delay before you hear the unit go silent. This can take about 15 seconds (or longer) before it shuts off. If it never goes silent, the ASOV (auto shut off valve) or possibly the check valve may need to be replaced. Water is going down the drain. Please check the FAQ section of the site. Or contact me so I can get you replacement parts.
A comment about quick-connect fittings: These are super easy to use. Insert tubing into the collet of the fitting, pressing firmly. Tug slightly to secure it. If you need to remove the tubing, press the collet against the fitting, and the tubing will be released so you can pull it out. I wish all plumbing was this easy! See the video above.
The clear canisters (sumps) surrounding the various filters are made of acrylic. They do not bounce, and they are more brittle than PVC. However, I prefer to see the filters for visual inspection. Please handle these gently and they will last for years. Only tighten them hand-tight to avoid breakage. If it holds water, it is tight enough. To loosen the acrylic housings, the included wrench will help. For further details, refer to these instructions.
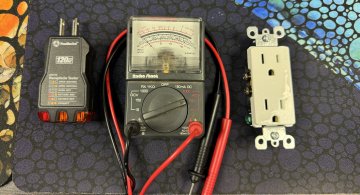
To test the output water’s quality, a TDS meter is a great tool. The goal is "0". You can also test for chlorine with a kit available at any pool supply. Again, you want it to read "0".
Filters - The sediment filter (first one on the right) and the two carbon filters should be replaced every 6 months. The RO membrane should last you three to five years. The DI cartridge will change in color as it is used up, and its lifespan varies depending on how much water you make and how high the TDS is going into the resin - it could last 4-5 months, or as long as a year. Testing the TDS of the RO water and of the DI water will provide the information as to when the DI needs to be replaced. If the TDS is higher coming out of the DI, the media is fully expended and must be replaced. This page will explain how to change the filters correctly. If you need to buy more filters, you can do so here.
If you have any problems, check the RO/DI FAQ page for more details.
If you have any additional questions about your installation or have any needs for additional parts or filters, please email me and I will be happy to help you.
Limited Warranty
Melev's Reef makes no claim to the suitability of this product for any specific use. The end user is solely responsible for determining fitness for a particular use, and for installation. This product is sold as a component of a custom aquarium installation.
Your product is warranted to be free of defects for a period of one year from purchase. We will, at our discretion, repair or replace your product at no charge during this period. Return shipping is the responsibility of the purchaser. This warranty does not cover accidental damage, misuse, improper care or alteration, or acts of God, such as floods and earthquakes. Coverage terminates if the original purchaser sells or otherwise transfers the product. This warranty excludes claims for incidental or consequential damages, loss of revenue or profits, loss of business, or other financial loss in connection with the warranty problem. Some jurisdictions do not allow the exclusion of limitation of incidental or consequential damages, so the above limitation or exclusion may not apply to you. This warranty gives you specific legal rights, and you may also have other rights, which vary from state to state or country to country.


