29g Sump & Weir
After years of deliberation, I decided it was time to expand the limits of my aquarium. I'd studied up on "Wet/Dry" systems, "Sumps" and "Refugiums." Following the advice of others, I investigated those various types of systems, and determined that a sump with refugium would be best suited for my 29-gallon tank's stand.
The benefit of adding a sump to my tank is that it allows me to add more volume (of water) to my existing set up. This dilutes the potential situation more, giving me a little more leeway as things progress a little slower. Toxicity can't rise as quickly and water conditions should remain stable longer. Another benefit is it allows me to move things out of the tank, such as the heater.
Due to space constraints, my CPR Bakpak protein skimmer will remain on the tank, although many people like to put their skimmer in the sump as well.
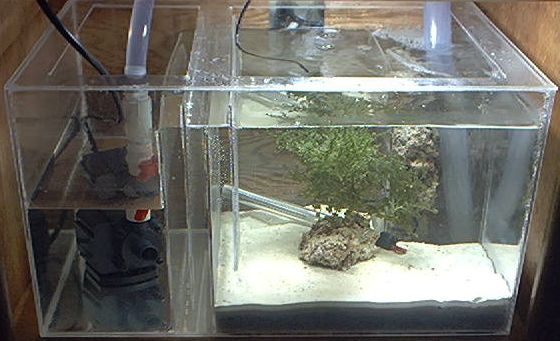
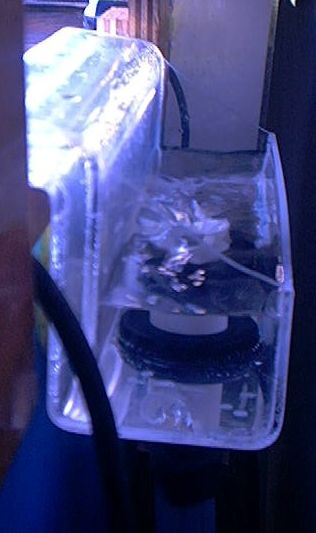
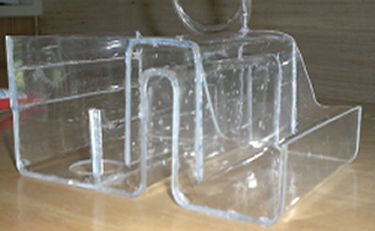
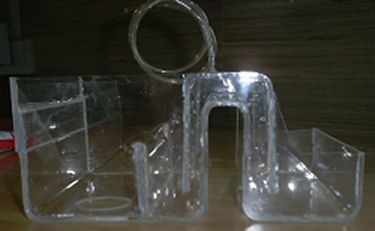
I designed my sump with a refugium on the right side, and the return on the left. Below are a couple of pictures of the sump as it was built. One error was caught by another reefer (Thanks Kev!), and has been fixed, even though the picture doesn't show it.
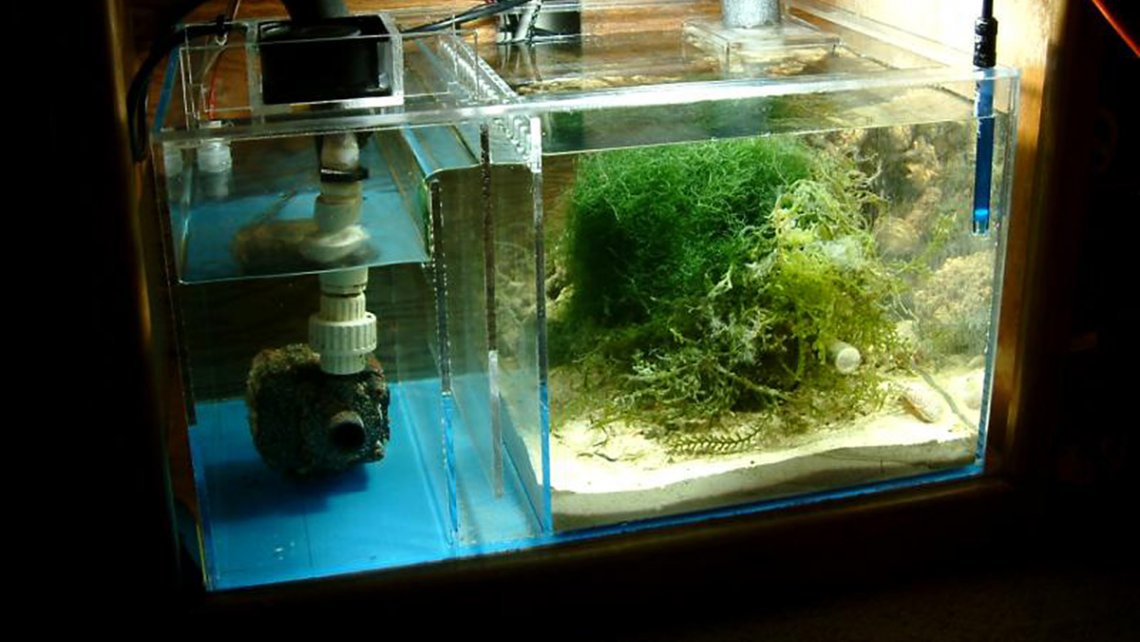
 Full set up with sump installed
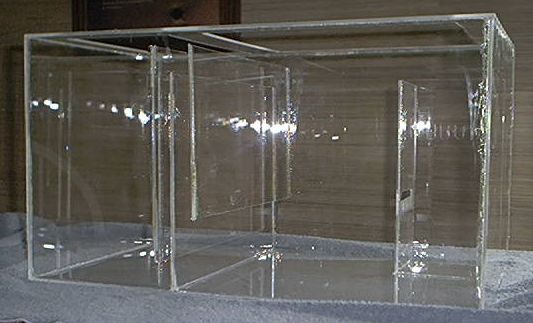
This tank is 12" tall, 22" long, 14" wide. It can hold roughly 14.5 gallons of fluid.
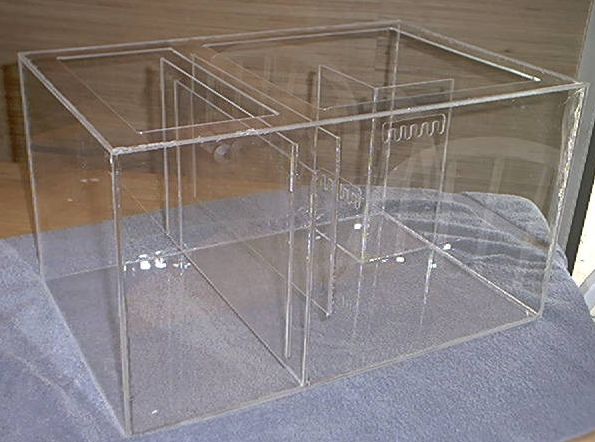
The water will enter through the small box in the right back corner. From there, it will flood into the larger area that will soon be filled with live sand and macro algae. It exits that chamber via a bubble trap, and accumulates on the left side. From that chamber, a submersible pump will pump the water back up to the tank.
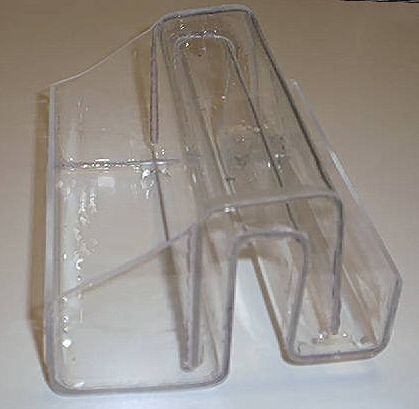
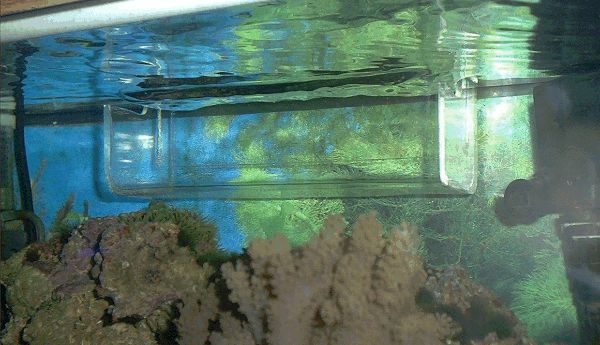
This is called a "weir". It will hang on the wall of the tank, half inside and half outside. The water will flow over the wall of the tank, and drain via flexible tubing into the sump/refugium located beneath the tank. This picture lets you see the basic design. It is 8" wide, has a 1.5" trough inside the tank, and a 3" trough outside. It still needs the necessary plumbing parts connected to the larger side, and then it is complete.
I was able to bend the 1/8" acrylic by heating it up with a propane torch. And it was rather fun, actually. The acrylic was glued together with Weldon #16, which was rather messy, but #3 was out of stock unfortunately.
The cost of the acrylic and glue was less than $70. Just to buy the weir/overflow box from a mail order outfit would have run me about $66, or at my local fish store (LFS) it would have been closer to $100.
8/20/02
The parts I ordered came in, and yesterday I set everything up. First I mounted the light above the refugium area, to feed the algae I'm growing. The idea is to keep this light on when the tank light is off... and by doing so, it will help the pH levels stay up where they belong. I will be doing some testing to see if this is indeed the
result, after a month or so.
You can see the sump now that the sand, water, live rock rubble and calerpa algae have been added. The water drains into the rear right corner, where the live rock rubble (smaller pieces) is located. It is used to cut down on the bubbles entering the sump. About the light... It is merely a small spiral fluorescent power compact. I got it at Home Depot, and it's 29 watts (that puts out 75w). They sell them as plant (grow) lights for about $7 each, and I put it in a small reflector hood that I bought for $5. It isn't building up any heat that I should be concerned about.
The sand is less than one 40lb bag of CaribSea Sugar Fine Sand, which cost $25 at the LFS. They gave me a cup of their established sand from the corals tank to seed the rest.
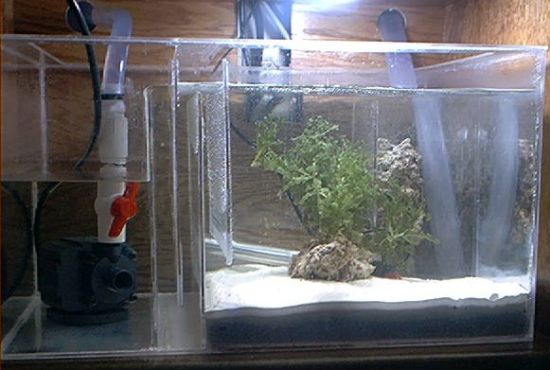
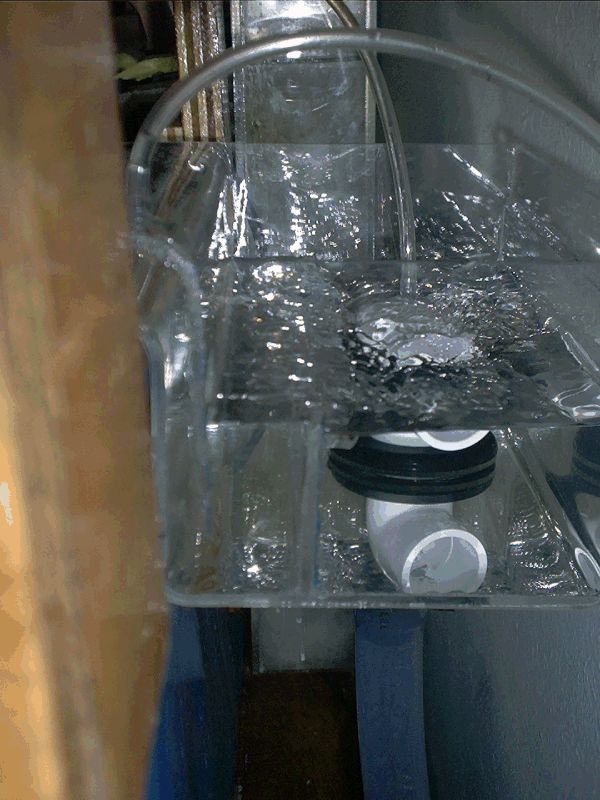
The Mag Drive 5 pump can move up to 500 gallons of water per hour, but to push the water 5 feet up and into the tank actually reduces it to 300 gallons per hour. Basically, it will move the volume of water in my tank 10 times per hour. I did add a ball-valve to control the flow, just in case, although it is currently running at about 90%. I also moved the heater out of the tank and down into the refugium area as well.
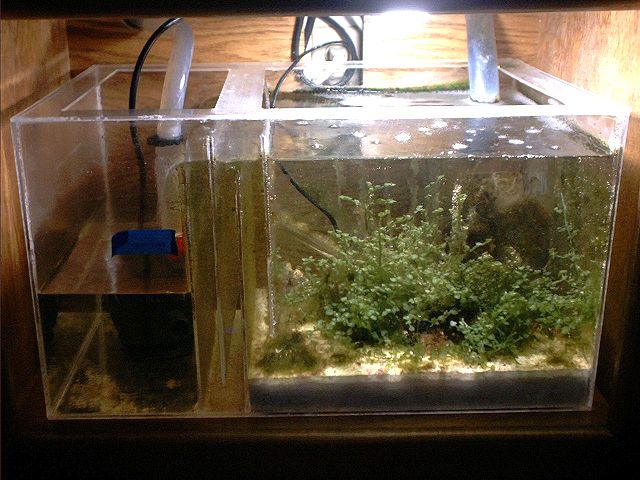
Sump after one month - The caulerpa has grown well. I've seen numerous creatures wandering across the plants, the sand, and the tank walls. One bright green slug is very interesting, but stays on the foilage. The insects are odd to watch, because it just seems these are what you'd see on land, not under water. I found a very small starfish (brittle star) near the front of viewing area, as well as a couple of bristle worms. Hair algae is also growing in the refugium as well.
The weir (overflow box) is really the most complicated part of the system, because it is designed to pull the water out of the tank, OVER the wall! Many have holes drilled in their tanks and drain it that way instead. These pictures give you a side view and a slightly better view of it in action. The water drains through a bulkhead connected to 1" ID flexible tubing.
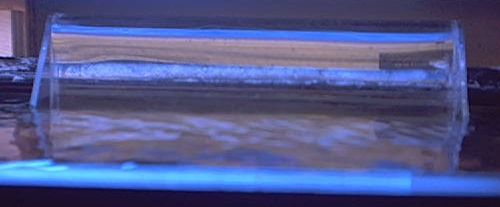
Not much to look at, but this is the front view, right above the water line.
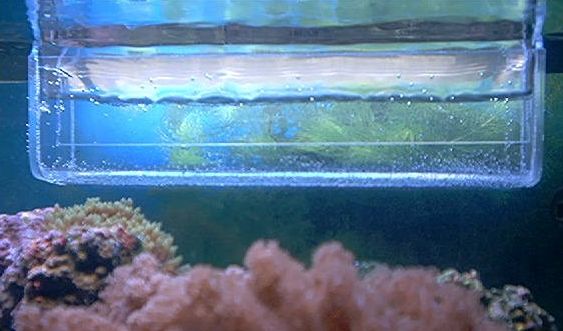
This is the bottom section, under water. You can see how the water is pouring into it. It then goes under that lower piece of plexiglas, and is sucked up and over the wall into the rear section.
To be honest, I'm not happy with my current weir, and will build a larger one to replace this one. It needs a larger area hanging on the outside, with higher walls to help keep the suction in the event that the sump turns off for any reason.
Right now, if the power cuts out, the water in the return line will suck some of the water out of the tank and into the sump, but not to the point of overflowing. However, if the weir can't maintain its suction (this one won't!), when the power does turn back on, the pump will keep pushing water up, but the drain line won't work. And the fishtank will then overflow, something I don't want to ever have to deal with! So I'll make a new weir very, very soon, perhaps this weekend.
8/26/02
Weir II: I'm going to number these things until I'm happy. Actually, I think this one will work just fine. I've changed the configuration from the last one. This one is 7" wide, the inner portion that hangs inside the tank is 3" instead of the original 1 1/2". This allows more water to flow into the chamber, compared to the previous one. (Due to its smaller area, it pulled the water downwards, possibly causing air to be drawn into the weir.) The outer chamber is now 5" wide, instead of 3 1/2". In addition, the outside section's walls are doubled in height to avoid water overflowing the edges when tinkering with it.
Two new additions:
1) A divider was added to the outer section, to assure the weir remains primed.
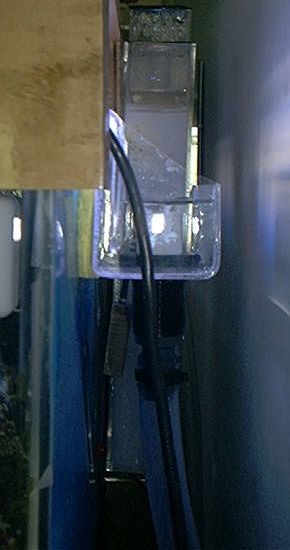
2) A small piece of rigid tubing was glued in the top of the weir. Airline tubing will go from that to a powerhead. This will continually draw out any air bubbles from inside the weir, keeping it fully primed at all times.
Click for DIY plans to build your own overflow, including description.
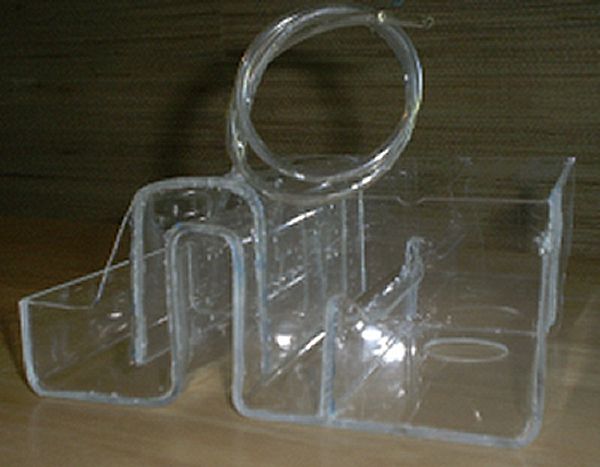
These pictures show the weir after it was glued together. After 24 hours of cure time, it was ready to install.
The new weir is just below the surface of the water. It draws in water nicely, but no real suction is apparent and thus no air is being sucked into the chamber! :)

The bigger weir works perfectly. I did have to insert a small spacer to balance the overflow box at the correct angle. It drains into a 1" bulkhead. By inserting a 90° pvc elbow, it reduced the slurping sounds.
When the power is cut to the system, the tubing drains back into the sump, raising the water level in the return area by 2.5 inches. The weir remains primed, the water held in stasis. Perfect!!!
The sump was replaced with a better stronger version, called the Model A, since it was the first. You can read about the Model A here: Model A