What is a sump?
A sump gives you greater control over your reef or fish-only display tank. The benefits far exceed the risks, and thus most successful aquariums you'll see utilize a sump. Some even incorporate a refugium as well. Here are the numerous benefits derived from incorporating a sump into your current setup:
- Increased total water volume - This dilutes your water of accumulating pollutants, and helps avoid issues that occur quickly in sumpless tanks.
- Skims the surface - No more surface scum, just crystal clear water.
- Lowers temperature - I've observed a 2° F drop after the sump is installed.
- Hides equipment - Heaters, protein skimmers, monitoring probes, grounding probes and more can be moved to the sump & out of the display tank.
- Consistent water level - The display tank will maintain the same water level all the times; evaporation occurs in the sump over time (see auto top-off).
- Safe place to pour in additives - Adding chemicals or new (Reverse Osmosis De-Ionized) water in the sump allows it to mix before entering the display tank.
- Increased circulation - The return water from the sump is yet another way to move water in your tank. You can point the return outlet(s) in different directions to create flow, instead of putting more powerheads in your display tank!
- Increased oxygenation - As water drains into your sump, air mixes in the water, allowing beneficial gas exchange, releasing CO2 and adding fresh O2.
Optional Features:
- Automatic top-off device - Install an automatic float switch to add new water, as needed, from a nearby holding tank to keep your system filled up. Example
- Refugium - This lighted area can grow macro algae, which takes up nitrates from your water. The plants also add oxygen, and help maintain pH levels when the display's lights are off. This predator-free zone will allow good growth of copepods, amphipods and other microfauna that eventually end up in the display tank as food for your inhabitants.
So how does it work specifically?
Water drains from the display tank into the sump container beneath. The water is pushed back up to the tank with a "return" pump, which is either submerged in the sump or run externally (which involves bulkheads and plumbing, but avoids adding as much heat to the water). As the water rises slowly in the display tank, it flows into the overflow box (or chamber), and this drains back into the sump. It is a constant cycle, and the goal is to pump as much as the tank can drain. Most people aim for 10 to 15 times the volume of the tank for total circulation. The sump's return flow would be a portion of that total circulation, maybe 3 to 5 times the total circulation, and the rest is provided with powerheads and/or a closed loop system.
 |
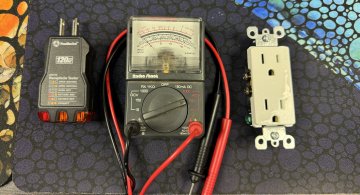
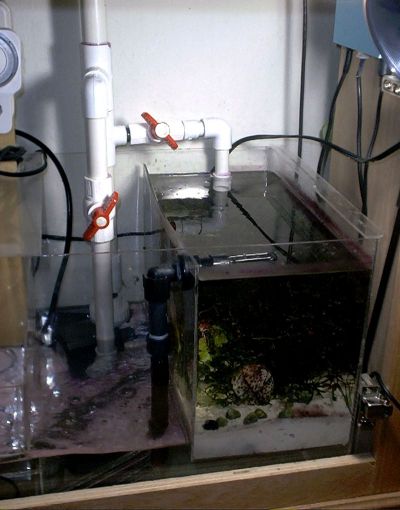
Noteworthy Points:Green Light: Return pump ON
Red Light: Return pump OFF
|
How does a weir, or overflow box like the above work?
The way it works is that there is a baffle on the inside and one on the outside, to keep the 'bubble' of water trapped in that center zone (the inverted U) until flow is restored. If it has a leak, air will bleed in and water will go out, and the siphon is lost. So it has to be tested with water after it has been built. Take it to the sink, thread or snake in a piece of airline tubing into that chamber, and while water is filling the inner box, you suck out the air with your mouth on the end of the tubing. Then you watch it closely, to see if any airbubbles start bubbling up inside that chamber. If you see none, it is perfect. See this page for info about building your own.
Many pre-drilled tanks have an internal overflow chamber made of black acrylic surrounding a drain or hole. Depending on the tank, it may have one drain or several, in the corners or in the center. As the water pours through "teeth" at the top of the black acrylic, it rushes through the bulkhead drain in the base of this chamber and down into the sump. Because these drains tend to be quite noisy, people build their own Durso Standpipe , Hofer Gurgle Buster, or Beananimal system. Many discussions about these silencers can be found online.
How do I determine what return pump I need?
To establish flow rates, you have to get a pump that will match how fast the drain will flow. I have a 1" drain on mine, and because there is no volume of pressure over that drain (or bulkhead), my maximum flow rate is 300gph. If the bulkhead were at the base of the tank, and I had gallons of water pressing down due to gravity, it might drain as much as 600 gph. But that is not the case. In the outer box of the weir, there is maybe a pint of water, so it goes more slowly. You want to find a return pump that will match your drainline, but you also have to figure head pressure as well. How far does the pump have to push water back up to the top of the tank to refill it? The submersible pump in the sump under my 29g has to push water straight up 5 feet. So a Mag 5 at 5' pumps 300gph. A perfect match!
Courtesy ReefCentral.com, here is a head loss calculator
 |
|
This picture displays the return plumbing, including an additional horizontal valve feeding water to a refugium. The vertical section has a valve to bleed off excess water back into the sump. Details |
To avoid too much flow to your tank, in case your pump is too powerful, you can put a "tee" in your return plumbing, and an elbow pointing straight back down into your sump. Then you put a ball valve on that. If the valve is wide open, the majority of your water will go straight back into your sump. The more you close the valve, the more water goes up to the tank. This is the best system, because your pump will never feel a restriction and it won't shorten the lifespan of your pump.
What is a return line? Is that just a pipe going up?
The return line is the plumbing used to get the water back up to the tank. Rigid pipe is preferred, with a minimum of 90° elbows. The return line needs to have holes drilled in it to prevent excessive water from being siphoned out of your display. (See next point for more details)
How do I prevent a flood? I don't want the sump to overflow and ruin my floors (or carpet)!
To avoid your sump overflowing it must have room for excess water. When your sump is running, as water drains down from the tank, it is pumped back up. When the pump is off, some water will drain down into the sump. This will be water from your drain line, from your return line, and from the tank (which is determined by the depth of the weir/overflow inside the tank and how deep your return line is in the tank). You need to drill two small 1/8" holes in your return line, 1/2" below the water's surface when the tank and sump are running normally. These holes are referred to as a siphon break. When the pump is off, water is sucked out of the tank by the return line, but as soon as the water level reaches those holes, air is sucked in and stops any more water from being siphoned out of your display tank. Two holes are better than one, in case it clogs or a snail decides to park on the hole at the worst moment possible. Typically, you will only have 2 or 3 gallons drain down when the pump is off, so make sure there is enough room in your sump to hold an extra 3 gallons or more. You can figure out how much room you have with this equation [measured in inches]: L x W x H / 231 = Total Gallons
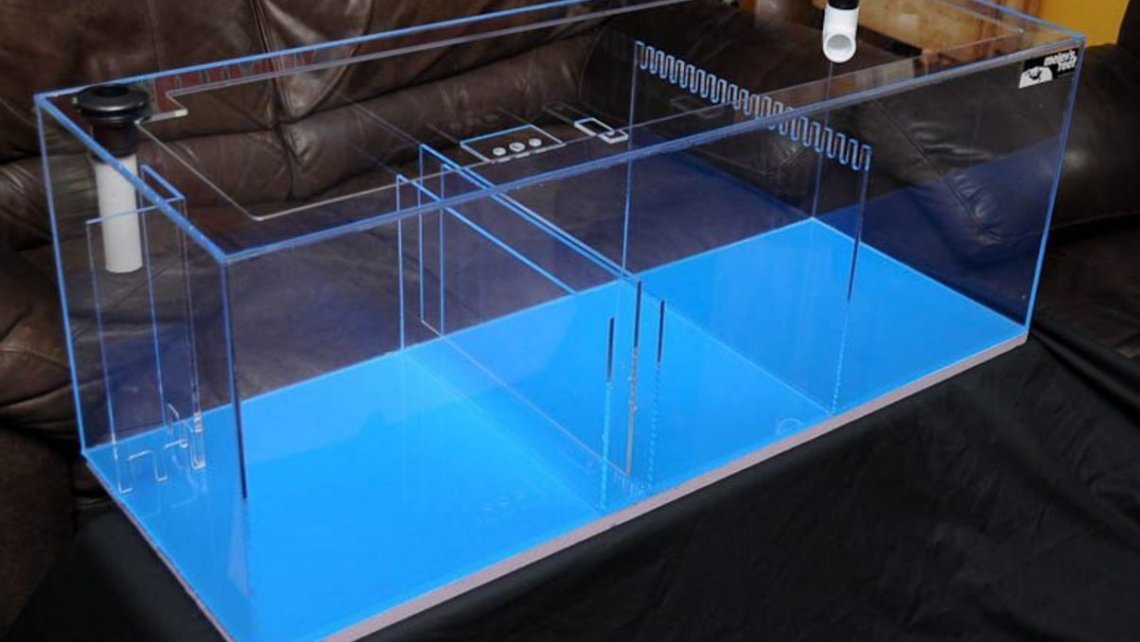
What is a baffle?
Any divider used within your sump is a baffle, which either separates compartments, or redirects flow in a specific direction.
How do I determine how many baffles I need?
A bubble trap is a narrow section within the sump that is made up of three baffles. The center one is higher than the two outer ones. The bubble trap should be located after the area that contains the most bubbles. Normally, that would be where the water enters the sump and your protein skimmer is located. Microbubbles abound in this zone, so the bubble trap would be set up next, to prevent these from continuing through to the refugium and/or return section. If you have a refugium next, you'll need one more baffle between the refugium and the return section. All four baffles should be the same height in this setup.
Another way would be to have the return section in the center of your sump, between the skimmer section and the refugium. Water would drain into the skimmer section and the refugium from separate pipes. The refugium's baffle can be taller now, allowing greater depth for growth of macro algae. The height of the bubble trap baffles on the skimmer side is determined by your skimmer's requirements (see below).
How much flow should I have in the refugium?
The flow rate through a refugium is slower than through the sump. By use of a ball valve on the water feed to the refugium, you can set the flow rate to your specific desire. You need to avoid stagnant water, and the surface of the water should be broken slightly to avoid a film growing on the surface. Try to achieve a gentle flow throughout this zone.
How far apart should my bubble trap baffles be?
The bubble trap baffles should be 1" apart, with the center baffle 1" off the floor of the sump.
How deep should the water be in my sump?
Depth is determined by the type of protein skimmer you use, and how much room you have under your display tank. Every skimmer is rated for a specific depth of water it can run in. If your skimmer needs to run in 5" of water, you can adjust this with a small stand to hold the skimmer higher up in your sump. Keep in mind that as you raise the skimmer up, it will get closer to the top of your cabinet supporting your display tank. You still need to have easy access for simple maintenance. Having more water in the skimmer section is ideal, because it allows more time for microbubbles to dissipate, and it allows you to have more water in your return section where evaporation occurs on an hourly basis. If you can run your skimmer in 9-10" of water by setting it on a stand, you'll get great results in my experience.
The water level in the section where your skimmer is located must remain constant. If not, the skimmer won't be able to operate effectively. This is why the skimmer is in the first zone of your sump, as that water level never changes, except when your return pump is switched off and excess water accumulates.(See next point)
How do I determine how much water I can safely add to make up for evaporation?
Mark your sump's water level. The return section of your sump (typically after the bubble trap -- explained above) will fluctuate as evaporation takes place. So when your sump is set up and running, turn off the pump. The tank will drain into your sump a little, and you'll note how much water has accumulated. If you have room for more water in the return area, add more. Turn the pump back on, and observe where the water level is in that section now. That is your maximum level. Mark that spot with a line, a piece of duct tape, whatever. Then when you top-off your sump with fresh water, never add more water than that line. Because if you do, and the power goes out, your sump will overflow. I have never had a sump overflow because I never cross that line. ![]()
How can I keep fish and snails out of sump?
Most overflox boxes come with "teeth" that prevent small creatures from entering the weir and drain system. However, snails don't care about barriers, and will climb out into the air to get to their next target. Observing snails in my overflow, they clean up the algae and crawl back out. Some may find a way to get deeper into the plumbing, and you may see one traveling down inside your drainline (if it is clear flexible material), seemingly unaware of their destination or current location. As long as they aren't an obstruction to your flow of water, it doesn't matter. The only place you must keep them out of is the intake of your return pump. I have snails in my refugium keeping the surfaces clean so I can see inside, but if one is in my return zone, I pull it out and put it back in the refugium.
Fish tend to stay in your display, but occasionally one will decide the amphipods are too delicious looking to not go for it. My Yellow Coris Wrasse has jumped through the teeth of the weir and had a fantastic time devouring every one of those pods. Before I could "rescue" him, he hopped right back out into the main tank again. Others have lost a fish for long periods of time, only to find them in the overflow. Others have discovered their loved pet in the sump! You can put a plastic screen over the surface of the overflow, like what is used to keep leaves out of gutters.
Do you have any examples of sumps I can look at?
Sure! Here's an entire section dedicated to sumps: https://melevsreef.com/articles/Sumps
Example how to build your own acrylic sump
I'd like more information, please.
Here are a few articles recently written in Reefkeeping Online that go into further detail:
Everything you want to know about sumps - Part I
Everything you want to know about sumps - Part II
Everything you want to know about sumps - Part III
I hope this helps you understand how a sump works, and how you can design one to your specific needs.
How to design your sump yourself. Questions answered, details explained, and general comments.
Something with HTML textformat