How to silicone baffles in a glass aquarium
A video is coming in Spring 2015, but for the time being here are the guidelines:
I sell acrylic baffles cut to fit your aquarium via my shop: http://www.melevsreef.com/product/baffle-kit Once arrived, this is how to install them.
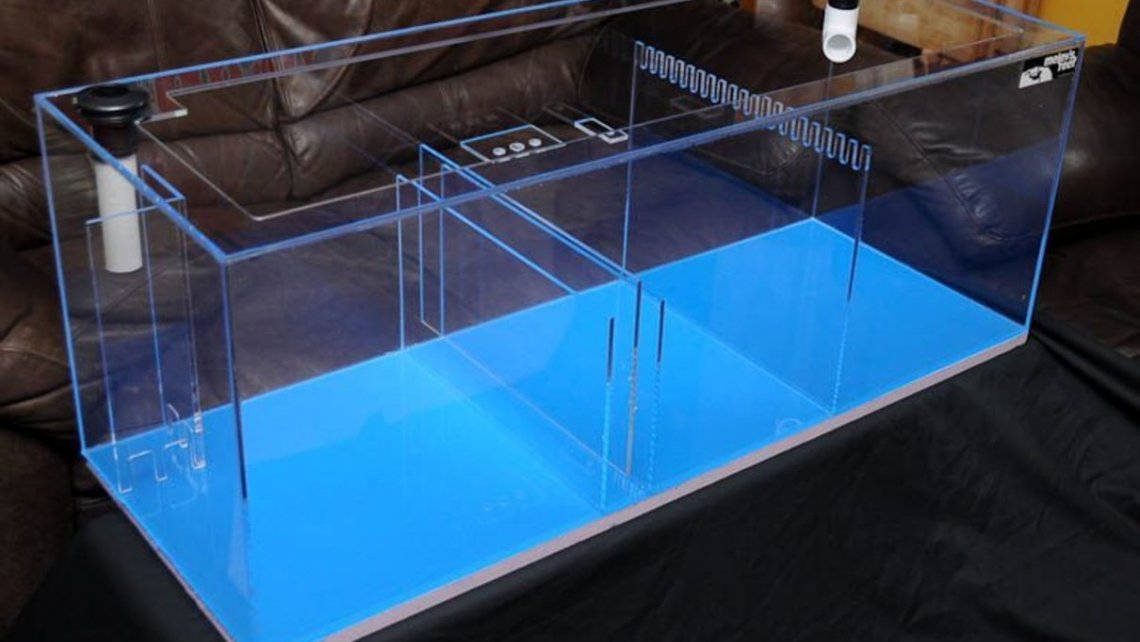
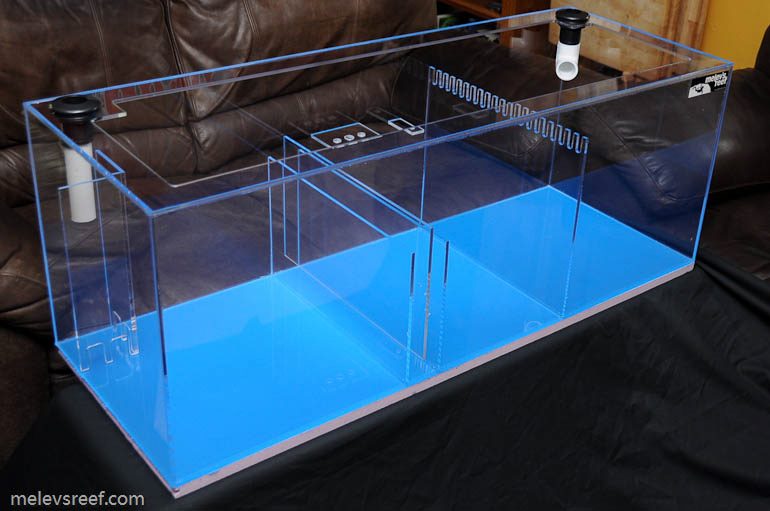
If you mimic the layout of the Model F on my site, you will be creating three zones. The layout is Skimmer zone on the left, Refugium zone on the right, Return zone in the middle.
Make sure the baffles fit. There should be a little play. If they are snug against the walls of the aquarium, it may crack the tank. If snug, you'll need to trim off a little more acrylic from the end of each piece to achieve the proper length. Ideally, you want about 1/16" of space on each end that the silicone will fill. You can cut these on a table saw, or clamp them to a board and use a router with laminate trimming bit to trim off the fraction that needs removal.
You need enough room for the skimmer and drain pipe, then you'll put the three baffles next to that area. The baffles are marked with an arrow indicating the top rounded edge I routed for you. This is a comfort edge so you don't get cut by a sharp edge when reaching into the sump, ever.
The space between each baffle needs to be 1" and the middle baffle should be raised up 1.5" from the bottom of the tank. I prefer to do the middle baffle first. You can place a small block or two of wood under it to keep it at the right height, and use aquarium-safe silicone to secure it in place. It will take a few hours for the silicone to cure. The second baffle (on either side of the first one) needs to be 1" away, and you can glue that in next.
While those set, glue in the refugium baffle with teeth. Odds are you'll want that section to be 8" or 9" long, but ultimately that is up to you. Glue it in place with silicone.
You will have one baffle left to install, but can't do it for a few hours because of the blocks of wood holding up the "middle" baffle. So once that has had time to set and cure, then pull out the support blocks and glue in the third and final baffle, again 1" away from the middle one. Remember, 1" gap between baffles.
This is the silicone you want, sold at Home Depot in the Glues Section for $5. Made by DAP; it's Aquarium-Safe. Just use this and avoid issues using something else (unless you buy some at your local fish store.)
Working with silicone is easy. I like to use blue masking tape, affixing it next to the spot I'll be applying silicone. It takes quite a bit of prep time to get all the tape in place, but the final product looks MUCH better. Plus the tape gives you some visual guidelines as you work so everything stays nice and straight. Once prepped, place the baffle in place. It will be a little loose, but silicone will fill the void. Squeeze the tube and apply it to the joint. As soon as you're done, take your finger and run it along the joint to create a smooth finish. If you wetten your finger, that will help smooth the silicone more. In exactly 5 minutes, peel the tape away to reveal a nice clean finish. Move on to the next spot and repeat, but always remember the 5 minute rule.
The project needs to cure for 24 hours before being used with water.