Maintaining Good Water Quality
I have read countless threads on discussion forums asking for assistance with water quality issues. Considering how many forums are available to hobbyists everywhere, it wouldn’t be difficult to imagine that hundreds of queries are posted on a daily basis just in the United States. With the availability of search engines, the information is readily available having been answered time and time again. Why is it so hard to master this particular area of our hobby? Are our personal circumstances so uniquely different from everyone else’s? Perhaps it is simply easier to ask the question and wait for a direct answer, but there is a chance that the answer won’t be accurate due to the responder’s inexperience or due to a lack of initial detail. Finally, how do you gauge if the answer or answers are correct? Since you asked the question, you don’t have the information to judge those answers, which means you have to decide if you can believe the respondents. I’ve also heard people say that they prefer not to get information from the internet, but I disagree. We have a huge knowledge base a few keystrokes away, and turning to it has become a way of life.
By researching a question via Google, it allows you to read an abundant amount of recommendations gathered up over time. Obtaining a better overview of possible solutions helps you judge the knowledge pool, instead of a very narrow sampling proffered in a single discussion. We’ve all asked questions no matter how long we’ve been in the hobby. Personal experience has taught each of us some lessons that were learned the hard way, at the expense to both our beloved livestock and our bank accounts. Most hobbyists try to inform others of mistakes made in an effort to help prevent similar happenings to their fellow reef keepers. We can be a protective bunch, usually erring on the side of caution. Yes, message boards are good in that way, opening the way for intelligent discussion, but let’s not forget to check the archives and compare notes.
Is there a simple solution to maintaining good water quality? Not exactly, but here are some steps that will help:
- Source water
- Decent Test kits
- Frequency of testing
- Dosing accordingly
- Optional methodology
- Longterm results
One point to consider before going any further: How is your livestock doing? How does everything look? Is the system clean, or overrun with algae? Are the corals healthy and thriving? Are the fish exhibiting any issues? If everything looks good, don’t make radical changes because of something you read or heard.
Source water
This can never be emphasized enough. The water you use in your aquarium needs to be the best you can provide as it is basis of the entire ecosystem. The absolute best choice is to purchase your own RO/DI (reverse osmosis de-ionizer) system. Having pure water at the ready is useful both daily and in an emergency. Additional reading: Why should you use RO/DI water?
Tap water contains all kinds of stuff designed to make it safe for human consumption, but based on some Total Dissolved Solids (TDS) measurements provided to me from people across this nation, there are areas where that isn’t true at all. If your TDS measures over 500, it isn’t considered safe for human consumption, yet people in Arizona are measuring 1200 - 1500 in some places. One suburb 45 minutes from me measures 800 while where I live it is less than 180. What about filtered ocean water? Some hobbyists have this readily available, but water quality can vary depending on who’s in charge of maintaining filtration. Suffice it to say, the more you can control how the water is filtered, the better. Owning your own RO/DI system that you maintain is ideal. Change those filters regularly and test the water to make sure it is producing perfect levels. If you let this decline due to lack of attentiveness, it will only come back to haunt you with frustrating issues in your aquarium.
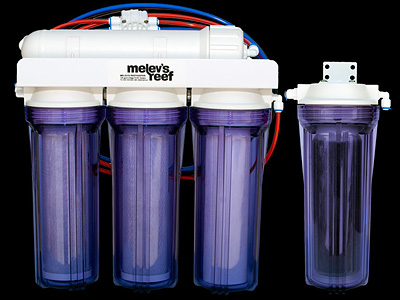
Get one today from melevsreef.com: http://www.melevsreef.com/catalog/rodi-systems-filters-0
For a reef tank, we mix RO/DI water with the salt mix of choice. There are many to choose from and people debate and defend various brands often. I’ve used Kent, Oceanic, Instant Ocean, Red Sea, and Sybon. For my new tank, I’ve decided to use Sybon salt exclusively, based upon how well it mixes and the measurable results I’ve gotten from batch after batch.
Salinity - The best tool to measure salinity is a refractometer that has been properly calibrated. These cost $40 and up, and the 35ppt calibration solution is less than $10. A few drops on the glass slide allows you to view the salinity precisely. The target range for a reef tank is 1.026 sg or 35ppt. Buy a refractometer and use it often.
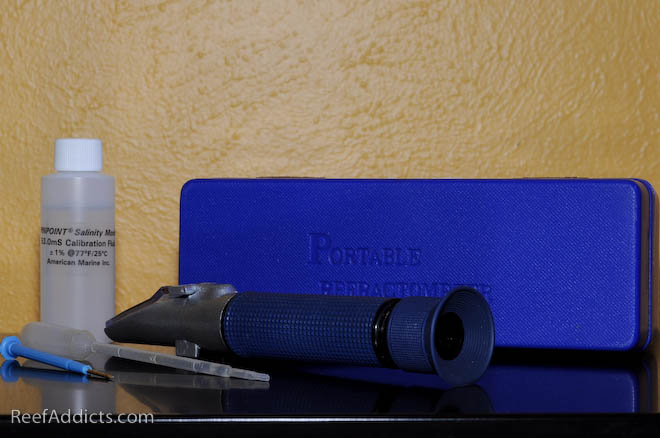
Test kits
I’m not brand loyal to any one line, and recommend getting the best kit for each of the elements we test for. If you happen to colorblind, you will want to seek out digital measuring devices like the new ones offered by Hanna.
pH: Your best option is a pH meter or an aquarium controller that uses a pH probe. Digital measurements will always supersede what a test kit or dip strip will tell you. Digital readouts update as you watch, and having a probe that you can move from tank to tank allows you the freedom to make sure all your systems are within the target range. The ideal range would be 8.1 to 8.3 each day. If your tank’s pH reads below 7.6 or over 8.5, something needs to be corrected. pH readings will be at their lowest early in the morning and at their highest near the end of the lighting period. I glance at the pH level of my tank often, but it is not a critical number I worry about. It is what it is because of the other elements in the water that have been ionically balanced.
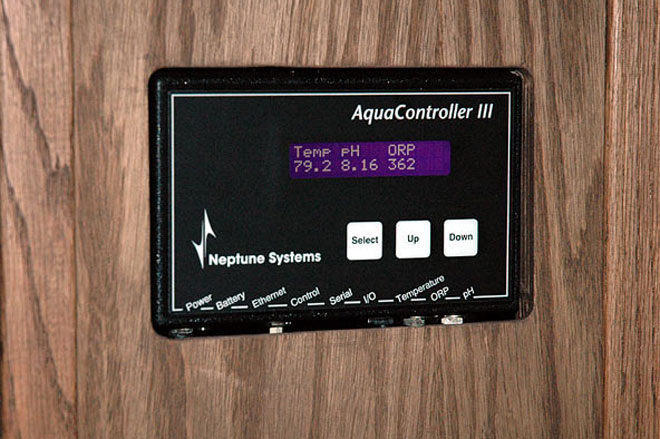
The Aquacontroller 3 displays the current measurements at all times.
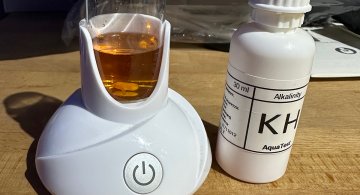
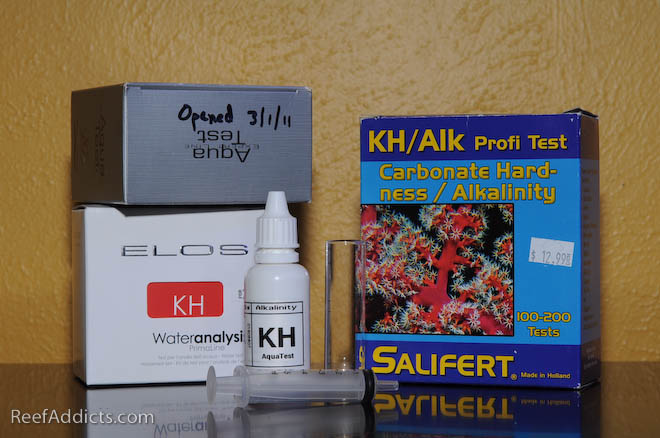
Alkalinity: I’ve used Salifert, Elos, Tropic Marin, and API to measure for this. This kit is usually affordable, easy to perform and easy read. The target range is 8 to 11 dKH, or 2.86 to 3.89 meq/l. Test this one frequently, weekly at the minimum. Alkalinity is taken up by the corals and fish in your tank, and needs to be replenished daily. The most used kit in my arsenal, to be sure.
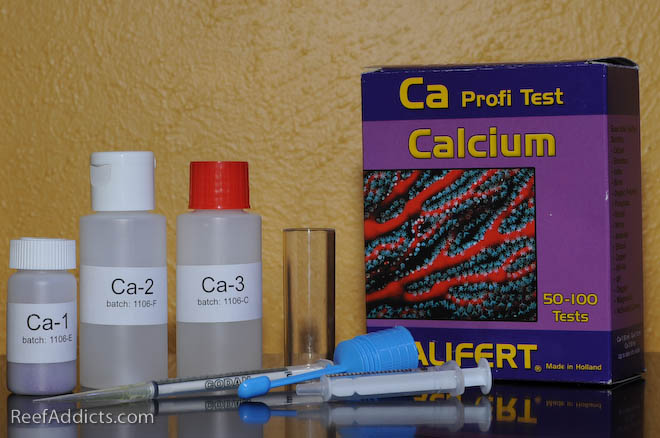
Calcium: Salifert’s kit is my preferred test kit for this element. Calcium levels should be checked weekly, and this too is taken up by both livestock and even coralline algae so it needs to be dosed daily. The target range is 390 to 425 ppm. Higher levels of calcium can be hard on some livestock, and to bring this number down simply don’t dose further for a few days and continue measuring with a kit to determine when dosing should resume.
Magnesium: Salifert again is the kit I continue to use. I’ve tried others, but this one has always worked reliably. The target range is three times the calcium level for balanced ionic levels, but I simply suggest keeping it between 1380 and 1400 ppm because that is what seems too keep Montipora sp colored up. If magnesium levels are low, it will take a lot of product to raise it up but once the target level has been achieved, it tends to stay there for a good while. For my reef, I probably dose Mg four times a year.
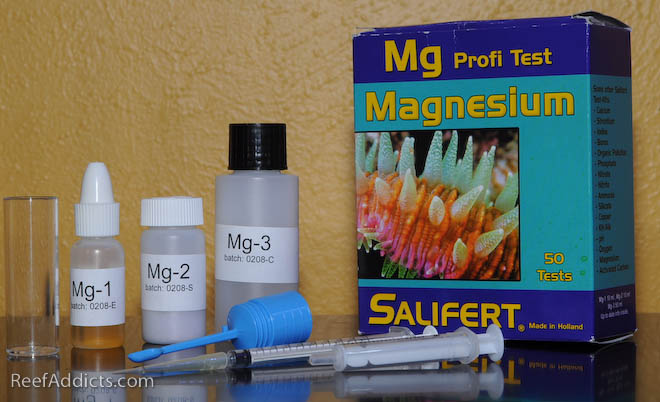
If salinity, alkalinity, calcium and magnesium are at their proper levels, pH will usually take care of itself. I don’t recommend dosing anything to make the pH a different number necessarily, but rather encourage you to verify that the alk-ca-mg levels are still on target. There are caveats to this, such as depressed pH due to excess CO2 in the home, but usually bringing in fresh air into your home will help correct this. Some have connected airline tubing from outdoors to their skimmer’s venturi intake lines to achieve this, which is useful in colder climates with homes that are sealed up tight.
Note: Whenever you dose anything to your system, remember that you don’t have to dose it all at once. For alkalinity or calcium dosing, it should trickle in slowly in an area of high flow. For magnesium, it would be better to dose a portion daily rather than the full dose to reach the desired level (recommendation: maximum 100ppm rise per day). If you are using buffer to raise pH, mix up the powder in 8 oz of water and gradually add some to the tank while watching the pH meter’s display. Add some then wait 15 minutes or longer before adding more, so the impact will be lessened on your livestock. Test the water after an hour or two to see how the dosage affected the corresponding levels. It’s best to only dose what you can test for, and dosing should never result in tank drama. Dramatic changes can leave fish gasping and corals sliming due to stress.
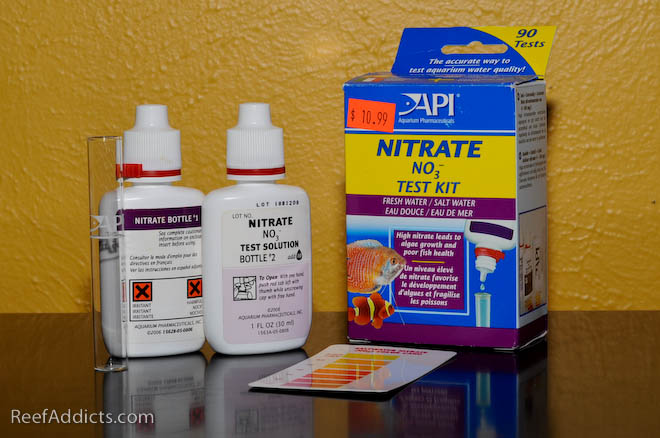
Nitrate: API’s test kit is simple to use, it’s affordable and easy to read. The lower the nitrate, the better. Less than 5ppm would be a good goal, and even lower would be great. Nitrate is in the water, and big water changes done frequently will bring these down.
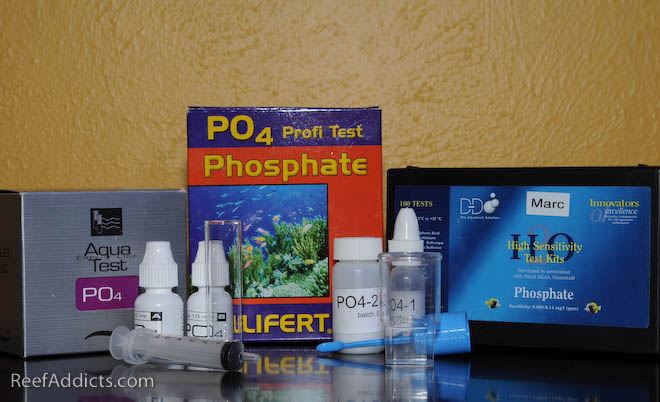
Phosphate: Salifert or Elos kits are both easy to use. The target range is .03 ppm and anything more than that needs to be controlled to avoid nuisance algae.
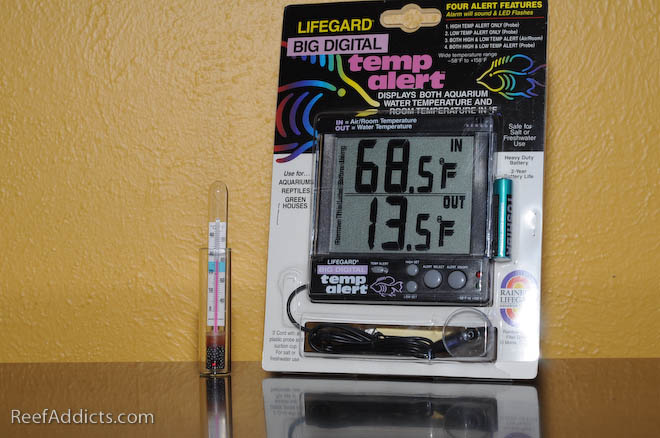
Temperature: Aquarium controllers measure tank temperature, or you can buy a digital thermometer as well as a cheaper glass one. From time to time, compare multiple thermometers to make sure they are reading accurately and equally. Tank temperature is important to maintain, and the target range I suggest is 79F to 81F. This two degree range is where my previous reef flourished. The controller I use turns the heaters on if the tank drops below 78F at night and brings it back up to 79F. As the lights run all day, the tank temperature rises gradually, and during the night it cools off.
ORP: Using an aquarium controller, the ORP (REDOX potential) measurement is constantly reported on the screen. The number itself isn’t overly important but what is is the consistency of that number. For example, if it normally is around 315 and then suddenly it crashes to 200 or less, something has changed and an investigation as to why needs to be performed immediately. People that run ozone watch this number closely to avoid overdosing the tank with too much, setting their controller to shut off ozone at a predetermined peak level. I don’t run ozone, so I would suggest that this number should read between 310 and 340 but again it isn’t a precise attainable number. Just one to keep an eye on to see if it varies all of a sudden, possibly due to dosing something that day. A lowered number indicates lower dissolved oxygen levels.
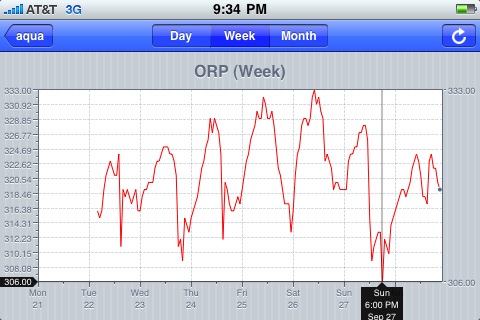
Sampling from a single week via Aquanotes App
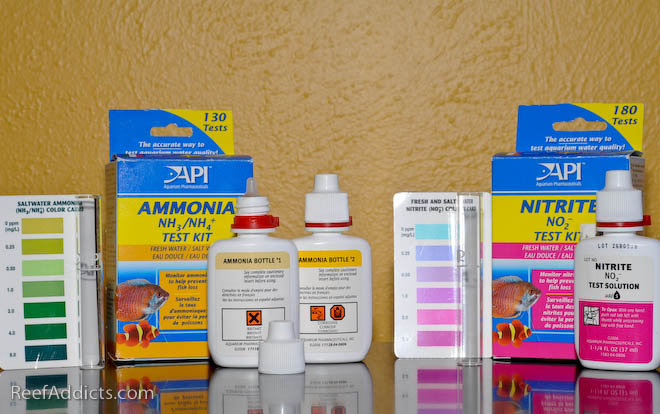
Nitrite & Ammonia: These are usually only tested when a tank is initially set up, when uncured live rock is cycling, or when livestock starts dying in our tank. When death and decay occurs, measuring nitrite and ammonia is important because elevated levels are toxic to fish and corals alike. The target range is always zero.
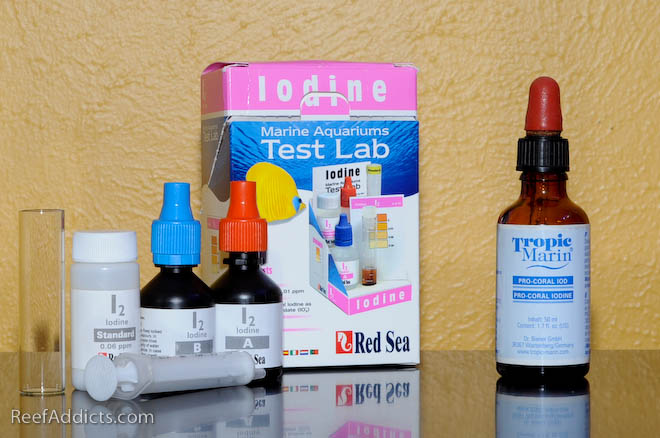
Iodine: Iodine doesn't last long in our tanks, but it is included in the salt mix. I've used a few Iodine test kits, but the results were spotty. Shrimp and crabs need iodine to help them molt (shed their exoskeleton), so dosing it weekly would be good. Lugol's Solution is offered under many brand names, and 1 drop per 50g best. Don't overdose iodine in your tank; don't even hold the bottle over your display or sump while dosing because a small spill will do major harm. When I dosed a single drop to my 29g reef many years ago, it seemed like nothing. Adding one more drop, my fish were suddenly gasping and appeared to be very distressed. How could I retract that drop?! Please be careful with iodine.
Testing Frequency
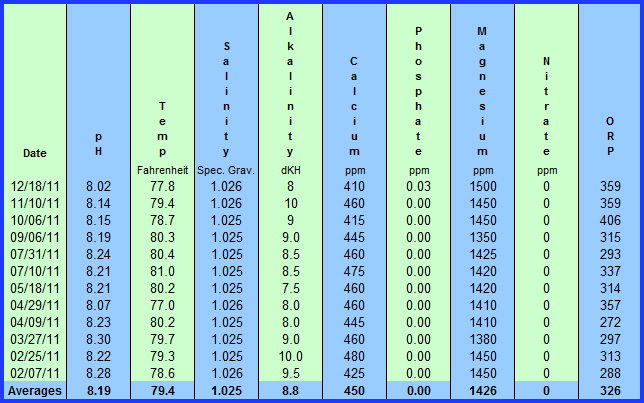
The above measurements are what I test for and watch frequently. Try to make it a routine, such as “Test Kit Saturday” or something similar. Record those numbers in a spreadsheet or a smartphone Application to be able to review your water parameter history. When things go wrong, the usual excuses are that the person didn’t test diligently in some time, their test kit ran out and they didn’t buy a new one yet, or their test kit is way past expiration. Try to make a mental note (or a physical one!) when a kit is getting low to pick up a new one next time you are at a fish store or ordering online.
Many kits have an expiration date. When I open a new kit for the first time, I write that date with a Sharpie on the box. Most kits are good for 12 months after you break the seal on bottles. If you are still using a kit that you purchased in 2007 just because it still has some test solution left, please trash it now and buy a replacement. Surely the total investment in your reef justifies the small cost of a fresh kit.
Another quality control step that you might consider is to test some water with both the old kit and the new one to see if the results are close to the same. Occasionally a brand new kit can be faulty, and false results could cause you to panic and overdose a product in a hurry to ‘fix’ what is allegedly wrong. If the number is really strange, ask a local hobbyist to test your water with their kit or head to the local fish store with a fresh water sample and have them double check those numbers with their kits. While you are at it, bring your test kit along and show them how you test to make sure you are doing it correctly. It never hurts to confirm your methods occasionally. If the store charges a fee to perform some tests, don’t balk at the idea. Just pay them for their time and get the answers you seek.
Dosing Accordingly
The aquarium is going to require regular replenishment of alkalinity and calcium, and occasionally magnesium. With frequent water changes, the new water may contain enough of these elements to take care of that demand, but the only way to know for sure is to test the water in the display tank. Also, test the newly mixed saltwater, especially each time a new bag or bucket of salt has been opened. Never assume the batch is fine, test and know for a fact that everything is normal.
As your reef matures, the demand will be ever greater for alkalinity and calcium. Ten years ago, everyone wanted a calcium reactor. These days, the preference has swung to two-part dosing. Is one better than the other? It comes down to preference. A calcium reactor has an initial setup cost of $500 or more, but after that the cost is minimal. CO2 refills and more reactor media are both very inexpensive. The benefit of a calcium reactor is the replenishment is done 24 hours a day. Two-part dosing costs less up front, but it is more labor intensive in that the person has to continue mixing up a batch of each part and replenishing those containers once depleted. With timers, dosing pumps and a controller, each solution can be dosed to the tank at regular intervals. With smaller tanks (55g and under), two-part dosing is probably the best choice, but for larger systems that require more product, I would prefer to use a reactor. I know a number of large tank (200g+) owners that dose two-part. Those huge exhibits in public aquariums use calcium reactors.
Which is more risky of the two? If the calcium reactor fails (too much CO2 injected; recirculation pump fails; feed pump fails), the media within is ruined and it has to be replaced. This would cost $10 to $25 to correct, and it is back in business. The tank would hardly skip a beat unless this wasn’t noticed for weeks on end, but with weekly water tests, it would be hard to miss. The media in the reactor would turn milky white. If the two part dosing system fails (runs out of solution; doesn’t shut off and adds too much), the reef would be affected negatively due to the huge swing in Alkalinity or Calcium levels. When you are out of town and someone has to watch your system, I think it would be easier to have them double check the output of the calcium reactor versus them knowing if the two-part dosing system was operating correctly.
Kalkwasser dosing is another method used to maintain alkalinity and calcium levels, but there is a risk of overdosing if too much is added at one time. I would say the majority of hobbyists do not use kalkwasser, as it has become less popular due in part to the many posted horror stories. In addition, pumps can seize up from the calcium deposits that adhere to their magnets, requiring more frequent cleanings after a vinegar bath soaking. The safest way to dose kalkwasser is to drip it into your tank for a specific duration during the night, completely separate from a top-off system. How much to drip is something each hobbyist would have to determine by measuring water parameters daily. Kalkwasser has a pH of 12, and too much will cause the pH of the tank to rise sharply. If an overdose occurs, white vinegar can be used to bring it back down. Please do your research and know how much vinegar you’d need to use to correct an accidental overdose BEFORE it happens. Type it up and stick it near your tank so you can find it quickly in an emergency. Like the Boy Scout’s motto: Be Prepared.
Optional Methodology
An area every hobbyist struggles with is water pollution. Our reef is full of hungry reeflings and we enjoy their response to feedings. The more we feed, the more quickly water quality worsens. Two measurements we test for are Nitrate and Phosphate, because we know these fuel algae growth. To combat these, we have several options. Some are perfect for newbies, while others are better suited for seasoned aquarists that have learned the nuances of their tank and can see issues just by looking at a few specific corals. Algae Turf Scrubbers (ATS), Refugiums, Carbon dosing, Product dosing, Denitrifying reactors, NP reactors, GFO reactors are some of the weapons of choice, and of course those never ending water changes.
For newbies (those that are new to the hobby):
A refugium with macro algae will taken up some of the nitrate (NO3) and phosphate (PO4) from the water, reducing the likelihood of nuisance algae growing in the display tank. By growing out “weeds” in the refugium zone, hair algae is less likely to take over the reef display. Cull out 25% or more algae from the refugium monthly to encourage more growth. The refugium needs a light source for the plants to grow, resulting in the benefit of additional oxygen (O2) in the water thanks to photosynthesis. Run that light at night when the reef is a rest to help keep pH levels up during the late night hours. With a refugium, regular water changes and a bunch of snails in your display tank, PO4 and NO3 should be controllable and nuisance algae should be preventable.
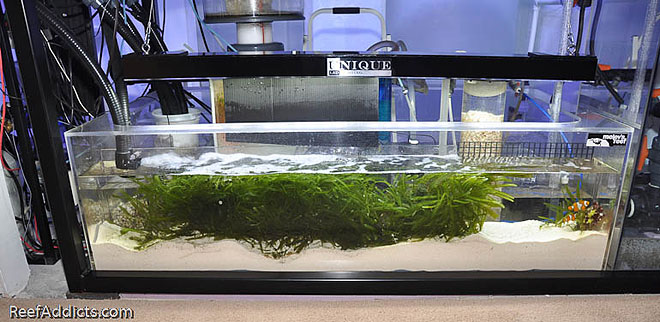
Algae Turf Scrubbers are beginning to make a comeback. They were quite popular in Australia for a long time. A perforated plastic sheet is set up at an angle in a section of the sump and water cascades down the slope. A bright light shines upon that plastic, causing algae to grow. Each week, the algae is scraped off and disposed of, removing NO3 and PO4 that was taken up by the hair algae. An ATS can be a little messy because of salt creep splashing around the affected area, and it may be a little bit noisy depending on the setup. It has to be maintained and tended to for it be effective.
GFO (granular ferric oxide) reactors are popular with many hobbyists, who use them to lower PO4 levels in their tank. GFO is basically rust particles that the phosphates adhere to. Using a Two Little Fishies’ Phosban Reactor or similar apparatus, water is gently pushed through the GFO media. What comes out of the reactor should be phosphate-free water. Running a GFO reactor around the clock should be able to reduce and eliminate measurable PO4 entirely. If the PO4 level in the tank is .25ppm and the output of the reactor is .03ppm or less, it is working. If the two are the same, it isn’t working and the reactor needs to be adjusted to slow the output until it comes out with that zero reading we desire. Once a week, the reactor needs a ‘puff’ of water surged through the media to avoid it becoming clumped or brick-like. Systems running high levels of alkalinity usually encounter GFO clumping, so the 15 second surge can help prevent this. GFO is usually good for one to three months before needing to be replaced. Caution needs to be taken that the ‘fines’ (GFO dust) doesn’t find its way back into the display, as some corals get stung by these. GFO should be well rinsed prior to being installed on the system, and the output or effluent could be directed to flow over some filterfloss to trap any fines that made it out of the reactor.
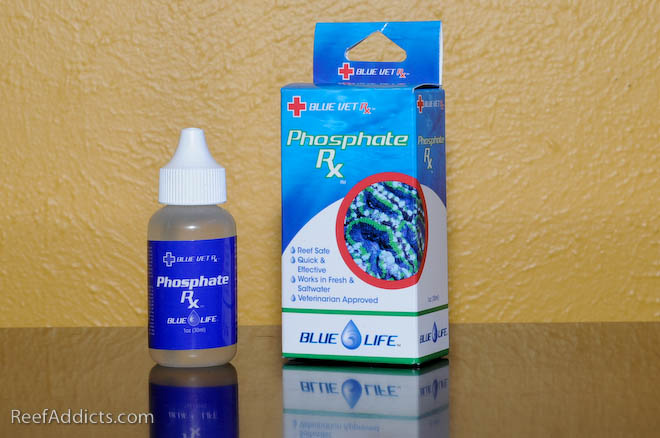
Phosphate Rx or Phosbuster Pro are liquid products that remove PO4 virtually overnight. The correct amount is dosed to the tank, causing the PO4 to turn to a solid. The tank will appear to be cloudy, and that will be exported via a protein skimmer or a 100 micron filter sock. I’ve used both products for several years and have never had any losses (fish, corals, invertebrates). I prefer to dose this flocculant late at night when the fish are at rest, and by morning the tank is crystal clear and PO4 measures zero.
Carbon can be used to improve water clarity and to reduce organics in the water, but it must be changed out frequently, as in weekly. 1/2 a cup of GAC (granulated activated carbon) per 50g of water in a Phosban reactor is a great way to keep the water looking sparkling clean with no green tinge.
Kent’s Nitrate Sponge or Seachem’s Matrixx media are designed to soak up nitrate from the water. These can be used in a canister filter or a mesh bag. Nitrate Sponge needs to be used for 48 hours, then taken off the system where Matrixx can be used indefinitely. Depending on the level of NO3 in the system determines how much media is needed and how effective it can be. Kent’s Nitrate Sponge is aluminum-based which can affect leather corals adversely, and it can take weeks for them to recover.
Seasoned Aquarists (you know who you are):
Vodka, Sugar, and or Vinegar dosing has proven to work at reducing nitrate and phosphate. It’s a slow process as the tank has to adapt to the daily dose of any or all of these three products. Each week, the dose is slightly increased. I dosed Vodka in my 280g reef for 7 months before seeing any change in NO3 or PO4 levels, but at last it worked. It dropped the NO3 levels from 65ppm to 0 in about two weeks’ time once I finally hit that dosing threshold. Vodka (or VSV) dosing is for the most patient of hobbyists, but it allows them to feed more heavily and enjoy better water clarity. Corals perk up because they are getting more light than previously when the water was a tad murky, for lack of a better term. Decreased nitrate levels produce stunning corals. Essential reading: Dosing Vodka - Why?
Zeovit / Prodibio / Biofuel and other bacterial dosing systems coupled with the dosing of Amino Acids can result in beautiful reefs, but it is for those that want to dose a drop of this and a touch of that on a daily basis like a mad scientist creating his own personal monster. It requires careful attention to dosing each additive, and many pin a dosing schedule to their cabinet door to make sure they stay on track and don’t omit anything that could make their efforts take a step backwards. It’s a tightrope that some can glide across easily, but their experience in the hobby helps them look for signs of trouble that a newbie wouldn’t spot so easily.
Denitrifying reactors are designed with an anoxic zone that depletes NO3 levels in the water. Within the reactor, the water moves so slowly through it that the oxygen levels drop, and an adaptive type of bacteria consumes the nitrate. Usually sulfur based, although I did see a vodka-based reactor by Deltec two years ago, these reactors need to be fine tuned by the owner, and they must be plugged into a Uninterrupted Power Supply (a UPS for a computer) in case of a power outage. If the reactor is powerless for over 30 minutes, bad things happen quickly within so the UPS is a form of insurance.
Biopellets are the newest craze for the reduction of NO3 and PO4. A media reactor is necessary, and it is filled up with a specified amount of NP (nitrate/phosphate) pellets that tumble gently. These polymer-based pellets become populated with bacteria, which slowly consumes the media over time. Hobbyists are still trying to determine how well they work, including myself. Biopellets should keep NO3 and PO4 at bay, while allowing more frequent feedings. So far, it’s working well for my 400g but my tank is young.
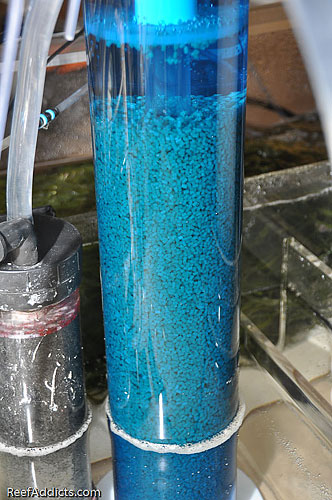
NextReef reactor filled with Vertex biopellets
Longterm Results
Armed with information above, you can choose to use what applies to your system and your level of experience. However, proper husbandry is equal no matter how long you’ve been in this hobby. If you become lazy or complacent, if you have test kits but don’t use them, if you have a refractometer but don’t calibrate it, if you have probes but don’t clean them, your tank will suffer.
Be proactive rather than reactive. Get passionate. Double check results and don’t make assumptions. Yes, you can look at a Birdsnest colony in your tank to tell if the water’s nitrate level has risen, or the Xenia population to know that alkalinity has gone askew. You can look at the coralline growth to know you have adequate calcium, but is your skimmer working efficiently? Have you checked the impeller magnets to make sure they are in good condition, not cracked and exposing rusty innards? What about the magnets holding that encrusted frag rack in your tank? Are they in good shape, or do they need replacing? Is your sump vacuumed clean of detritus, as well as the overflows? Are the Tunzes, Vortechs or other flow pumps in need of a vinegar bath? Are the RO and saltwater mixing barrels clean, or have you put that off too long? Are you still testing your newly mixed saltwater to make sure it has the same standards now that you originally set? Are your test kits in dire need of replacing?
Go nuts and clean up your system. It’s so much fun to work around a brand new tank because everything is clean and shiny. Clean up your current setup and get that new look back. It will be a lot of work if the tank has been neglected for some time, but thereafter you’ll be motivated once again, and you may notice some things that need your immediate attention -- before they can fail on you at an inconvenient time. Aquarium husbandry is a term to describe the person caring for the system. Are you being a good caregiver? If you are, your water quality should be in good shape.
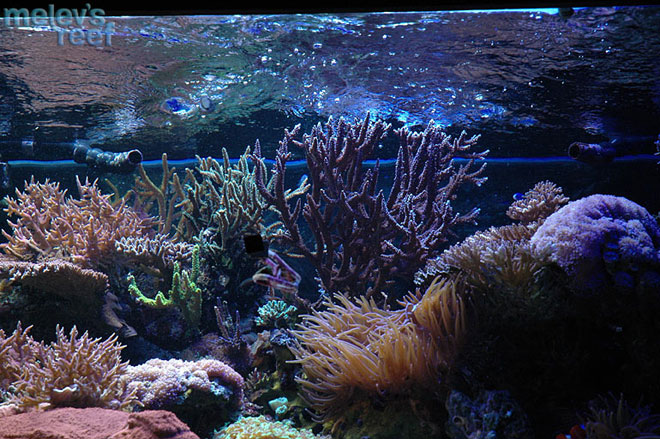
And your reef will reward you with beauty day after day.
Additional reading:
Chemistry And The Aquarium: Solving Calcium And Alkalinity Problems
