Make a Sump using a 20g Long
Do It Yourself sump using glass or acrylic baffles: Building your own sump using a glass tank isn't hard, nor does it have to be expensive.
Many hobbyists choose to use a glass aquarium, and then insert 1/4" (glass or acrylic) baffles, bonding these into place.
Below is merely an example. You may tailor the design to your particular needs and space.
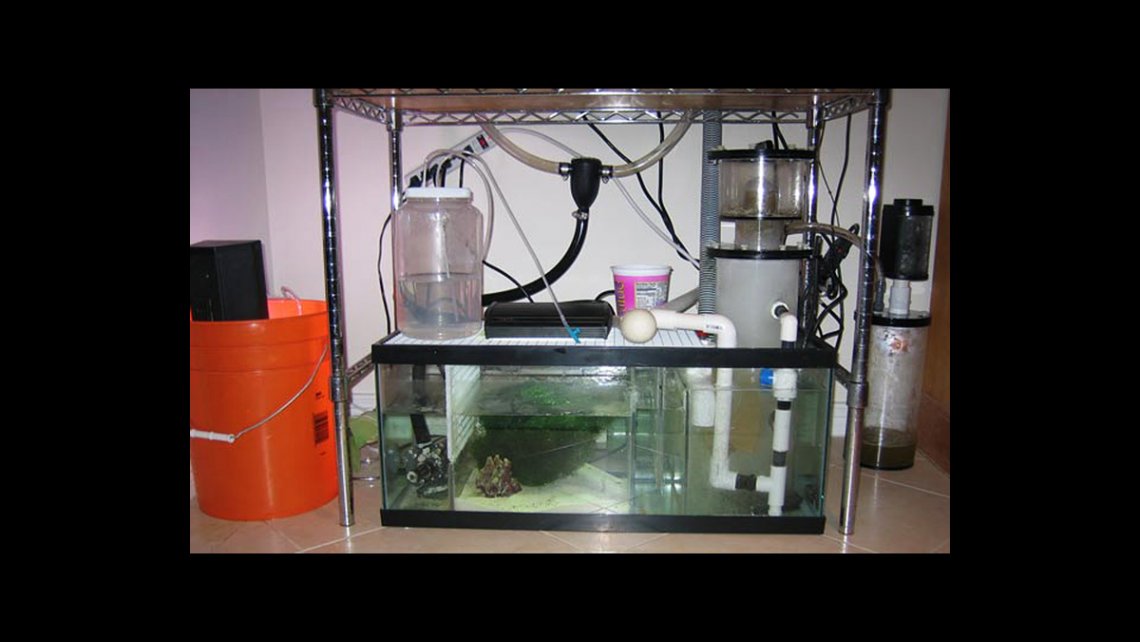
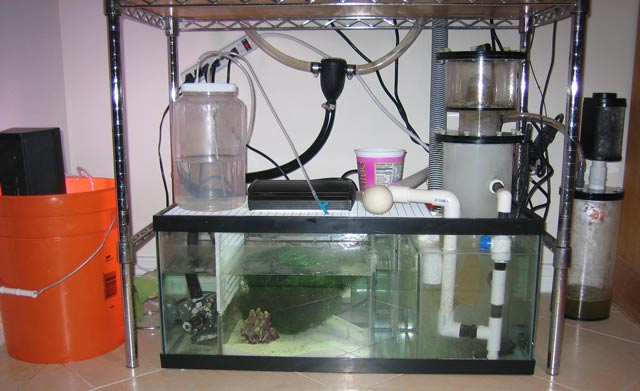
Prior Layout: The 20g Long aquarium above had some baffles wedged in place to stop microbubbles, but the layout needed improvement. You can't see the return pump, which is hidden behind the macro algae. The sand could very likely be sucked into that pump as well. The skimmer's output was pointed into the bubble trap.
The flow of this sump is from right to left, entering near the protein skimmer, flowing through multiple baffles and then pumped back up to the tank.
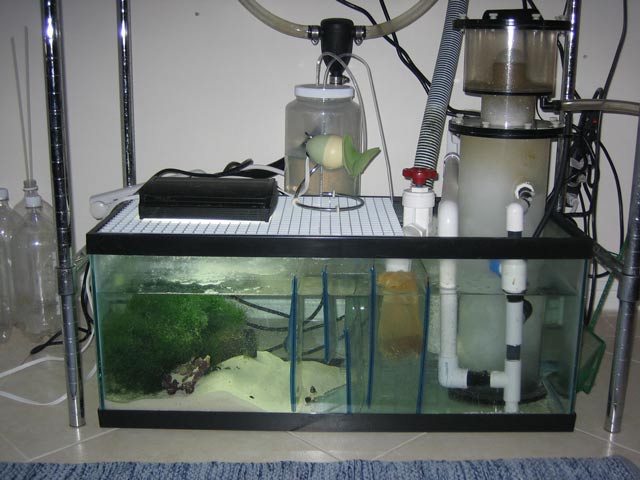
Updated: This is the same sump, modified only slightly and yet far more effective. Baffles were cut to fit, and glued in place with aquarium-safe silicone. Silicone does not bond with acrylic, but will bond with glass. In this application, the silicone acts more like a wedge than a true bond, as it adheres to the glass walls of the tank. If strength is an issue, use glass baffles instead. I recommend getting 1/4" glass cut at your local glass shop because it should be strong enough for this application. Windowpane glass (1/8" thick) is too thin and brittle. Have the glass shop polish the edges so you don't get cut while building your sump, as well as any time you need to reach into it for any reason in the future.
In the second picture above, you can see the return pump is after a small acrylic divider. This keeps the sand out of the pump and in the refugium section. By using eggcrate as a divider, the return section is enlarged to include the refugium section. As evaporation occurs, the refugium will become more shallow by the hour, so an automatic top-off device would be wise in this specific layout.
The tank drains into the first section on the right. The skimmer's output is in that first section, preventing microbubbles from passing through the rest of the sump. The bubble trap (the triple baffles) between the skimmer section and the refugium section assures this as well. Water flows over-under-over through the bubble trap. The third baffle (making up the right side of the refugium) has teeth to keep the snails in that section and out of the skimmer zone.
The item to the far right next to the sump is a Waste Collector for the protein skimmer.
Eggcrate is the white material you see above, and this is sold as Lighting Diffuser at Home Depot & Lowes. A 2' x 4' piece will cost $10. Aquarium-safe silicone is available at Home Depot for $5 near the glue in the Paint Department. Click the thumbnail above to see the Dap silicone product.
This sump still has enough empty space to hold any water that drains when the return pump is off. When you design your sump, you must make allowances for this water, or the sump will overflow.
The jug on top of the eggcrate is filled with one gallon of kalkwasser, which is dripped into the sump over time. The small black object is the light for the refugium zone, to encourage growth from the macro algae.
The black object above the sump that has tubing connected is a SCWD device. As water passes through it, water will flow out one side at a time, switching back and forth every 7 or 8 seconds.