|
The first sump I ever built was for my 29 gallon reef tank, during the summer of 2002. I made a few mistakes and my seams were really horrible. It was constructed with 1/8" acrylic and Weld-On #16. However, others loved it and copied the layout for their own needs. Finally, I made this new one to replace it. Below are a few daylight shots, because they are easier to study.
The large section is for the refugium. The last sump had a center brace across the bubble trap, making it very difficult to access that section. With 1/4" material, a center brace is unnecessary. The heater will be placed in the refugium.
The end section is the return section. It has plenty of room for the Mag 5 pump.
The rear corner is the intake area. I'll fill this up with Live Rock rubble, then insert the drainline. So sand won't block the teeth where the water will come out into the refugium, I ran a 2" piece of acrylic along the base of the chamber. The lid is removeable, but once in place will reduce salt spray. The plan is to contain the bubbling water coming from the weir box; to keep them to a minimum in the refugium.
Top view of the bubble tower. Now that I've seen it in operation, I wish I'd made it 1" taller. However, this sump didn't have any more vertical height to work with.
I added a set of teeth to the first baffle to prevent macro algae or snails from entering the bubble trap. It is working as planned, but the surface of the refugium isn't crystal clear. This could be because the sand was stirred up during the swapping of sumps and will clear up over time.
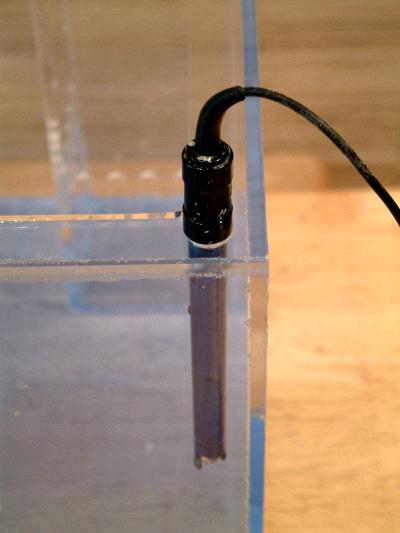
The pH probe is securely mounted in the front corner, and easy to remove when needed. 1/2" diameter hole.
The float switch activates a pump when the water level
in the return section drops due to evaporation.
Sump installed! The macro algae is Cheatomorpha and Caulerpa racemosa
Water pours into the bubble tower. The foam insulation reduces any algae growth within the drain tubing.
You can see the bubbles near the top, but water (with very few microbubbles) pours out near the sandy substrate.
My tank needs a cooling fan to keep the temperature down.
With a new sump, I had to redesign the cooling fan bracket. This version, the fan sits in the frame, but can be easily lifted out for cleaning. The frame is notched to fit the sump so that it can't fall into the water.
The fan was cleaned prior to installation. It had quite a bit of salt buildup coating the surfaces. The Mag 5 was cleaned as well!
|


